One of the critical factors that make a business successful is its ability to build long-term relationships with customers. And if you own an e-commerce business, follow-up emails are one of the finest methods to accomplish this.
Therefore, in this article, we will give you comprehensive instructions on how to set up follow-up emails in WooCommerce.
Let’s dive right in!
The Importance of Follow-up Emails in WooCommerce
Follow-up emails are emails that are sent in response to your customer’s actions. They encourage customers to choose a premium plan over a free trial, book a guided product tour, post a product review, and buy products,.. after an inactive time.
WooCommerce follow-up emails can help you improve relationships with customers in multiple ways:
- Seek feedback
- Thank customers
- Highlight products
- Turn customers into ambassadors
How to Set up Follow-up Emails in WooCommerce?
In this part, we’ll give you detailed instructions on how to set up WooCommerce follow-up emails using the plugin Follow-Ups by WooCommerce .
Step 1: Install the plugin
First things first, you need to purchase the plugin from this link https://woocommerce.com/products/follow-up-emails/. This plugin is charged at $99 per year.
Once having purchased it, you can start downloading the zip file of the plugin.
Once done downloading, from the WordPress admin dashboard, you go to Plugins > Add New > Upload Plugin > Choose File. Then, select the file that you have just downloaded.
After that, click on Install Now and Activate to complete the installation process.
Step 2: Create a follow-up
Now from the WordPress admin dashboard, you navigate to Follow-Up > New Follow-Up to start creating a brand new follow-up.

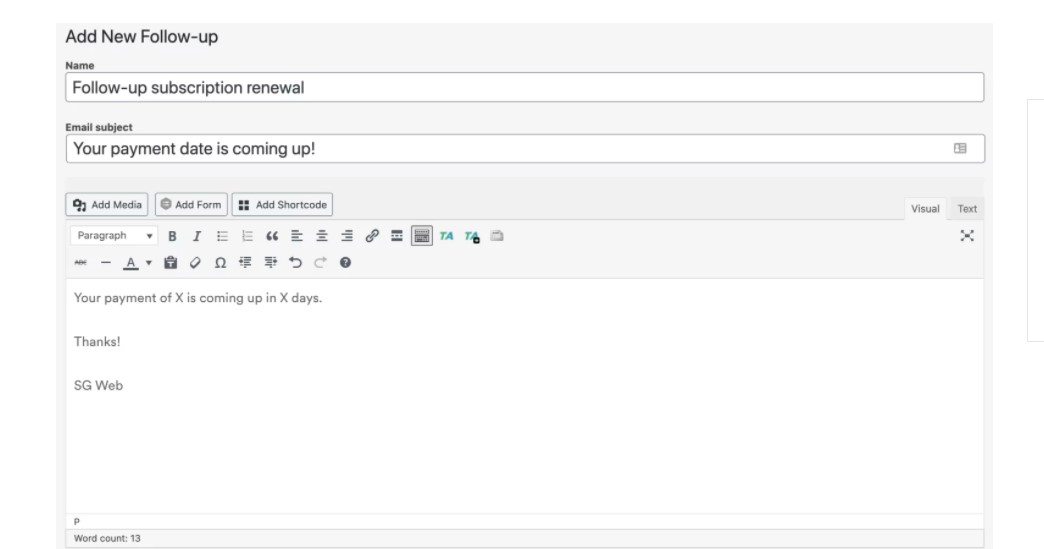
1. Enter name, email subject
Then, you need to give the new follow-up a name and write the email subject, which is the subject heading of the email.
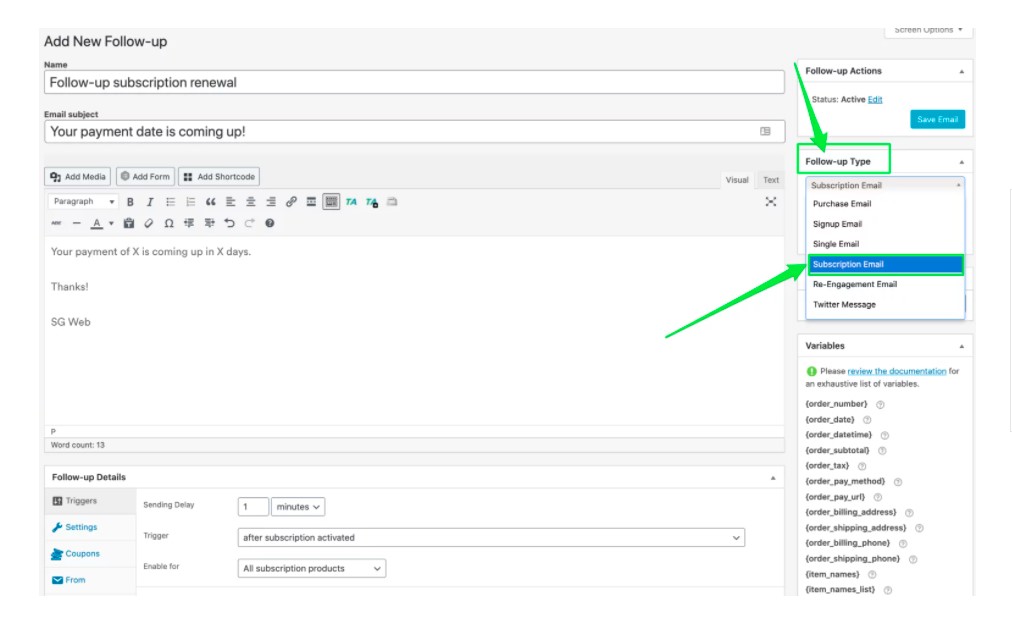
2. Select an email type
After that, you need to determine the desired email type from the dropdown menu based on your purpose and the email type functions.
Here is a run-down of the purpose and functionality of each email type:
- Purchase emails: A buyer generally receives purchase emails after making a purchase. This is typically a “Thank You” message, but it might also provide new information on the product you purchased, as well as other news or valuable marketing/promotion.
- Signup emails: Signup emails are often sent once a new user registers for your shop or fills out a registration form. This allows you to send emails to potential consumers who aren’t ready to make a purchase yet.
- Single emails: Single emails allow you and your team to develop email templates to use when you need to send emails to present or prospective customers right away. When you’ve finished creating your email template, click “Send” while hovering the mouse over the email name on the summary page to bring it up on an editing screen.
- Subscription Emails: (Requires WooCommerce Subscriptions) Customers will get subscription emails based on the subscription status you specify when designing your emails. You can mention discounts available for having a membership, trying out a free trial, or just signing up for a subscription in your emails. Customers often receive subscription emails when their subscription is due to expire or when their subscription status changes, such as activation, renewal, suspension, or cancellation.
- Customer-specific emails: Customer-specific emails will re-engage your audience by sending emails on prior purchases, such as product updates, information on similar items, or news or marketing techniques that may be of interest.
- Points and Rewards emails: (Requires WooCommerce Points and Rewards) Customers receive automatic emails when they gain points when they reach certain milestones in their points, or simply to remind them to spend their points and purchase. These emails might inform customers about the perks that come with attaining a specific milestone or the incentives that are offered.
- Emails Events: (Requires Event Tickets Plus) Customers who join up and purchase tickets to your events receive automated emails. The Events Calendar plugin is used along with Events Emails to manage all ticket activity for listed events. These emails can also alert your consumers of any changes to the ticket or event’s status.
- Bookings Emails: (Requires WooCommerce Bookings) WooCommerce Bookings is a plugin that lets you send Follow-Ups to clients who schedule appointments, services, or rentals for a certain time or day. When booking a product, customers are offered alternatives such as availability, pricing, people, and resources. Customers might receive these emails soon before their booking date, reminding them of their reservation or informing them of any changes to their reservation status.
- Twitter messages: If clients’ Twitter accounts are gathered, customer-specific Tweets can be delivered. These messages are similar to Re-Engagement Emails, but they are delivered to their Twitter account directly.
- Sensei Emails: (Requires Sensei) Follow-Ups for Sensei is a robust email course management solution for keeping your students, clients, and learners updated about changes to your Sensei course management program.
3. Write the email content
Now you need to compose the body of the email in the large text area.
4. Enter email variables
Following this, you enter any email variables you want. Email variables are fields (or merge tags) that can be included in different parts of your email and will be replaced with dynamic data depending on who the message is being sent to, when it is being sent, and why it is being sent. With built-in variables and merge tags, you can customize your emails.
Some variables, such as store name, customer email, and order number, are common to all email kinds and can handle all of the general information. Specialized variables are also available, which are only accessed when a certain email type is used.
Below are some common generic variables. You can read this guide to learn more about email variables.

5. Set Follow up details
It’s now time to set Follow-Up Details, which describe how and when the email will be delivered.
There are six options in total. However, not all of these six settings kinds may be available for all email types.
- Triggers: This determines when an email should be sent in response to a certain event or trigger (e.g., a purchase).
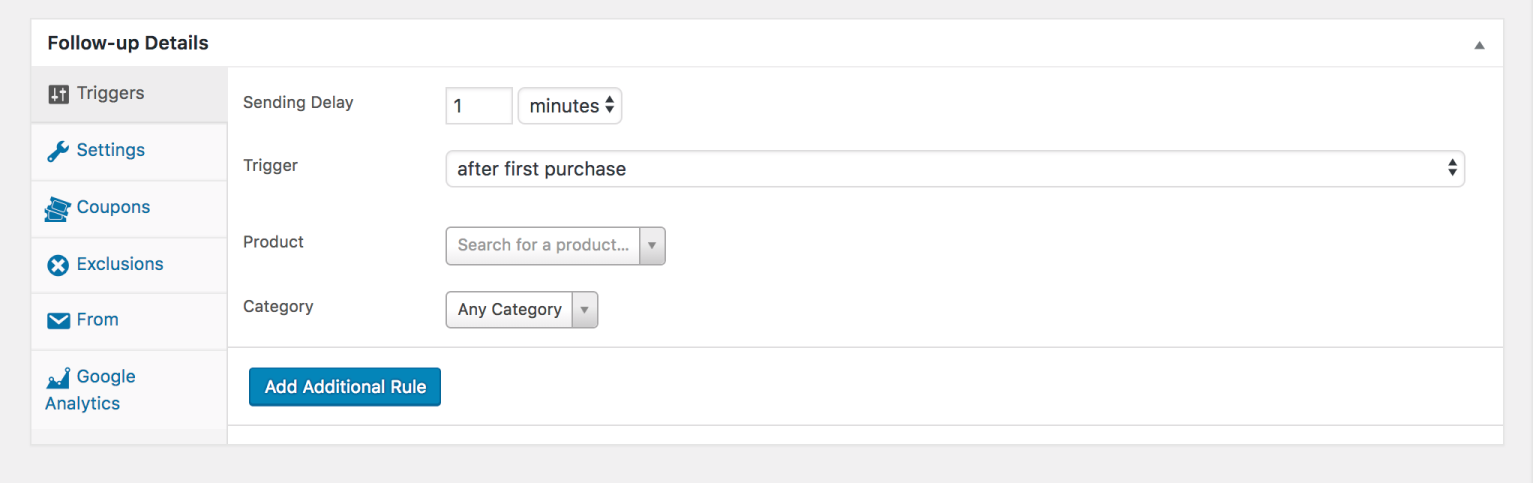
Delay in sending: Enter a number value and a time unit (minutes, hours, days, weeks, months, years) to decide when the email will be delivered.
Trigger: Choose an event to trigger.
Product: Choose a product from your inventory for which the trigger should be set.
Category
- Settings: Select email sending options by checking the boxes:
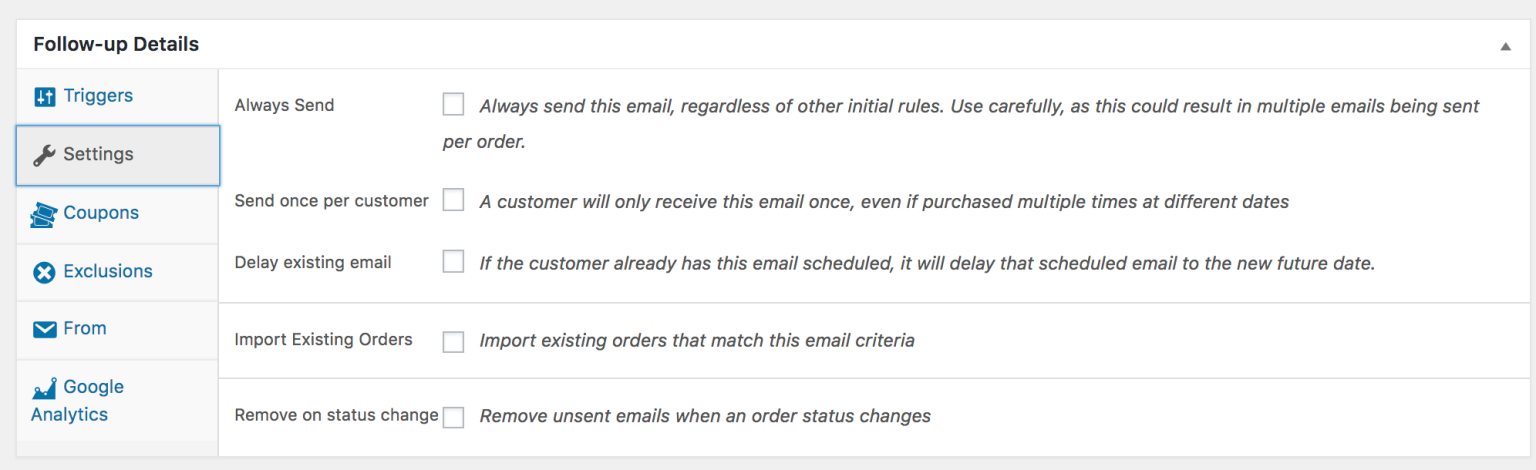
Always send: This option allows the email to be sent whenever it meets the requirements. If more than one email meets the criteria, this overrides any priority rules that only deliver the email with the highest priority.
Send once per customer: This ensures that each consumer receives the email only once, even if a similar product in the same category is purchased.
Delay existing email: This option ensures that the same email is not sent to the same client twice if it is already in the queue for a future send. Rather than adding another email to the queue, the send date of the previously produced email is moved to a future date.
Import existing orders: If you check this box and save the e-mail, you’ll see a button (in a notice) that allows you to import any existing orders that haven’t been processed, as long as they meet the email requirements.
Remove on status change: Choose to remove and not send emails that are no longer relevant as a result of an order status change.
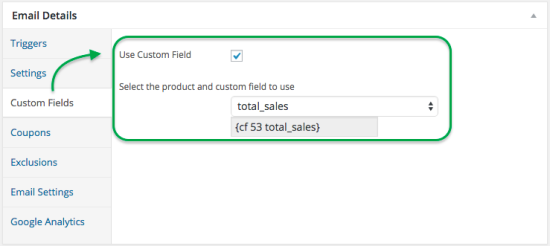
- Custom Fields: After you’ve chosen a specific product for which your email will be sent, a new option will emerge. Simply tick the box next to “Use Custom Fields” to bring up a dropdown menu. You could choose the custom field you want to include in your email, and it will provide the replacement variable to use in the email’s text body.
Coupons: Check this box if you’d want a coupon code produced and emailed to you. If you check the box, a drop-down menu appears, allowing you to choose the coupon.
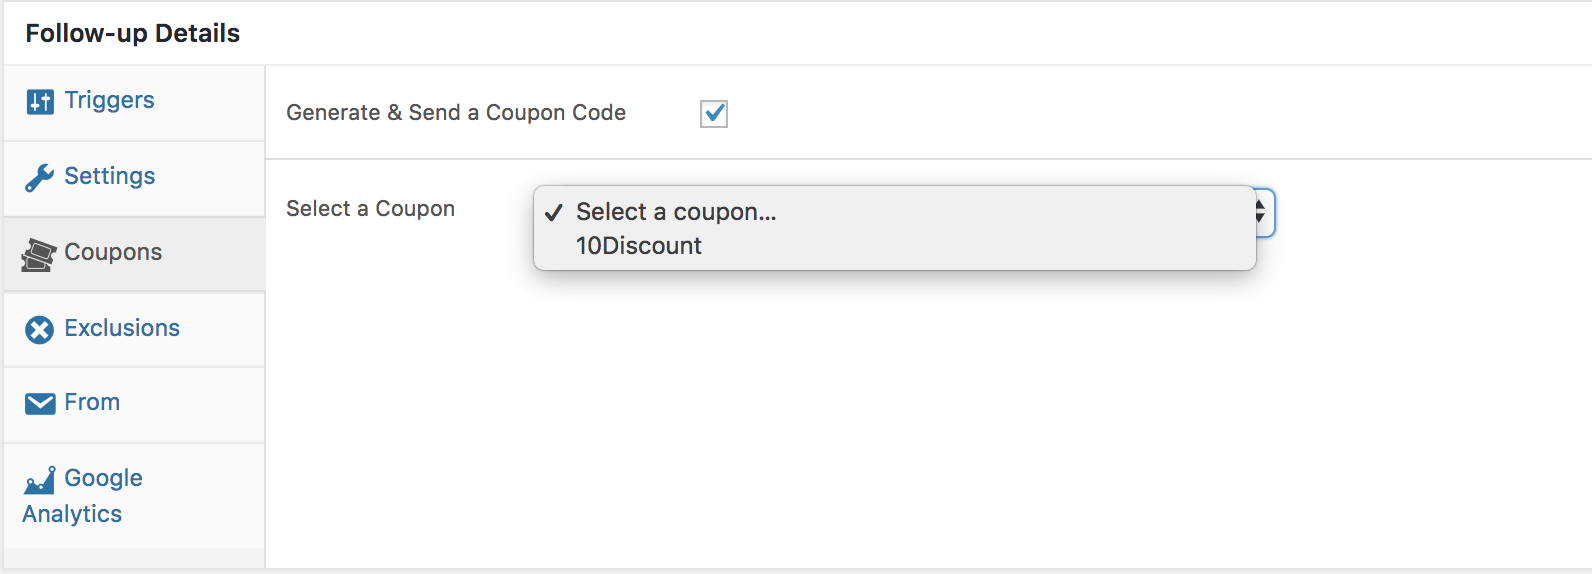
It’s crucial to remember that before you can use coupon variables, you must first create the coupon under Follow-Up Emails > Coupons.
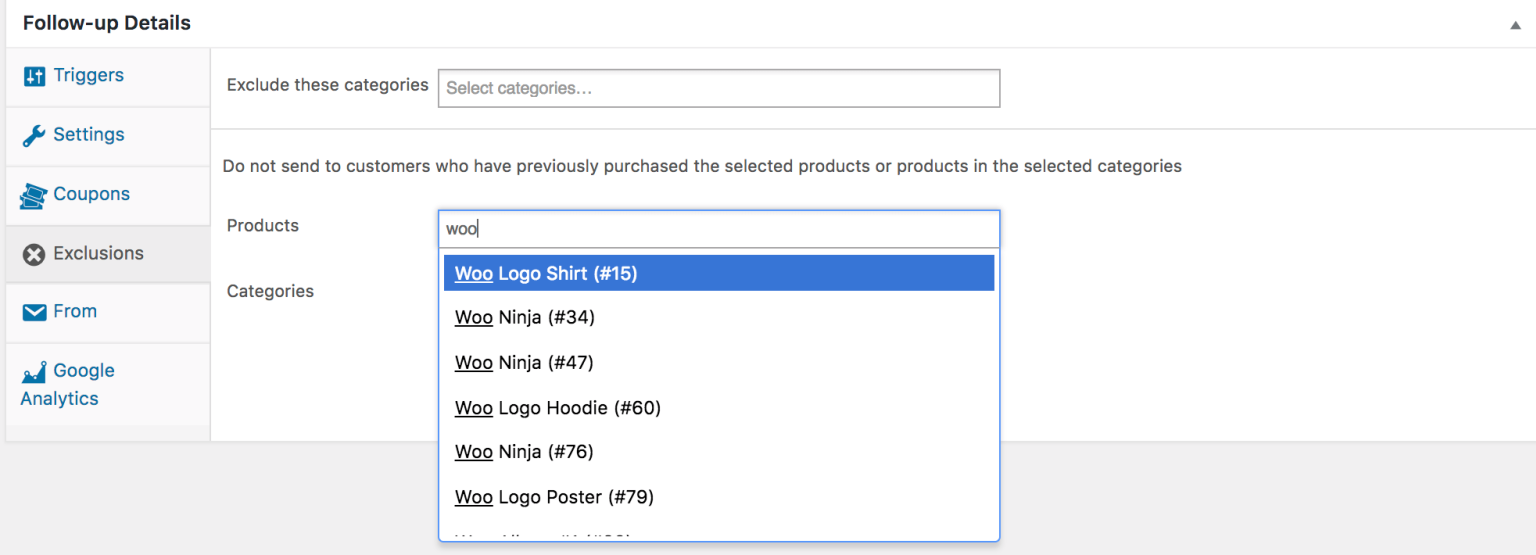
- Exclusions: If a client has already made an order in one of the categories, choose Categories or Products and Categories from the drop-down menu(s) to prevent the email from being sent.
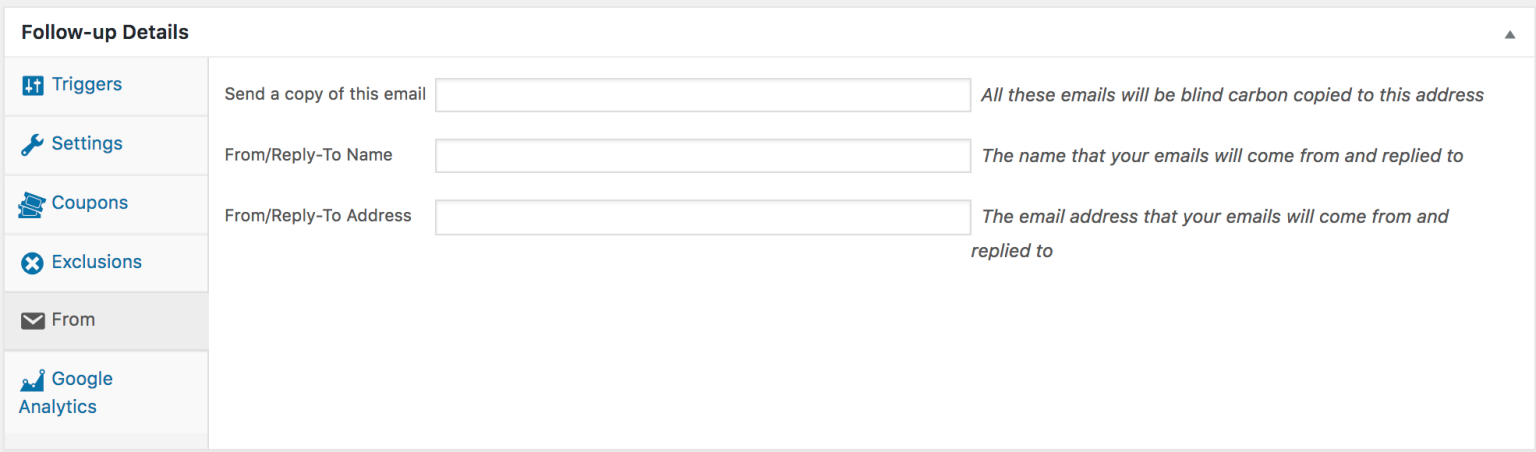
- From: Enter an email address for the BCC, a name for the ‘From,’ and the email address you wish for Sent From/Replied to in the text fields. Please keep in mind that any email addresses you put here only apply to the current email you’re working on.
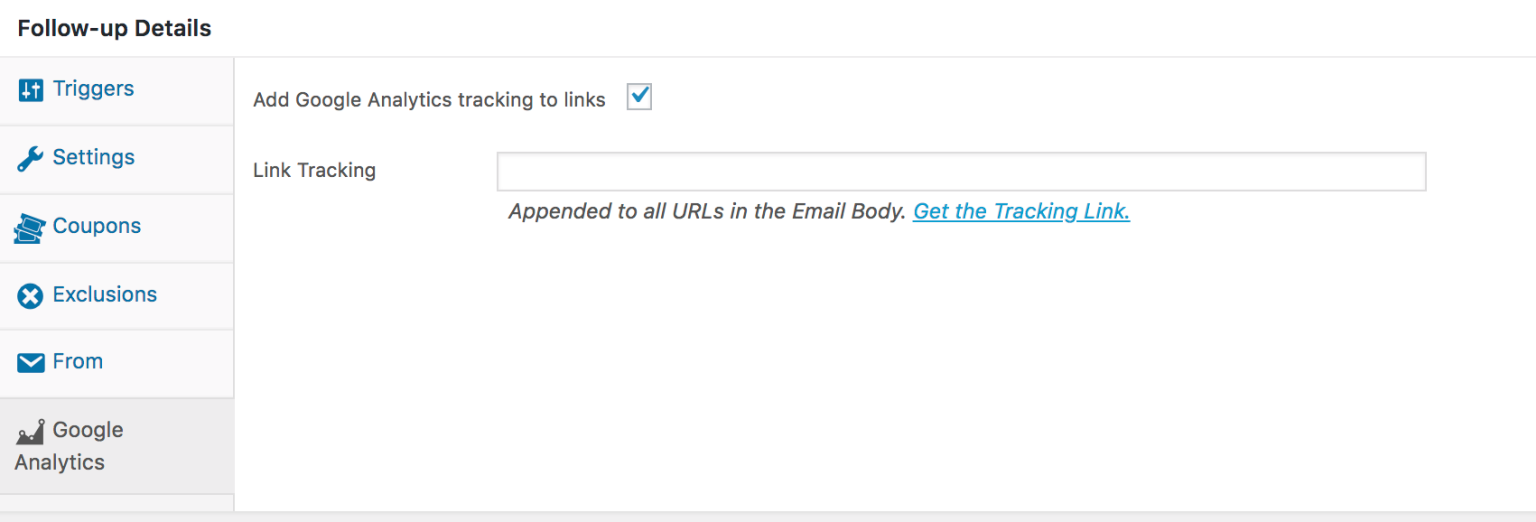
- Google Analytics: Select this option if you want your email links to be tracked. A text box displays if this option is selected. To get a link-tracking URL to put in the text field, click the link for the URL Builder tool. This URL will contain the information you’ll need to utilize Google Analytics to track and evaluate every link in your emails.
Additionally, you can send a test email to any email address using the Send test functionality or install your new follow up in the system for future use with the Publish button.
Step 3: Save changes
Once done, do not forget to click Save changes at the bottom of the page.
And that’s how you set up WooCommerce follow-up emails.
Best Practices for Effective WooCommerce Follow-up Emails

Below are six rules you should take into account if you want to generate successful WooCommerce follow-up emails:
1. Adopt a customer-focused strategy
Instead of focusing on how your emails can earn money for you, consider how they can give value to your customers. Recommend products that your consumers would appreciate. Provide them with substantial discounts. Pay attention to their suggestions and feedback.
To make clients feel welcomed and appreciated, you should keep your tone friendly and helpful. This will inspire them to stick and eventually become brand advocates, propelling your company to new heights.
2. Keep it short
Acknowledge your consumers’ time as a valuable resource. Use as few words as possible to convey your message.
The majority of WooCommerce follow-up emails can be completed in a few lines. One sentence to express gratitude for the activity taken by your consumer, and another to propose how they can continue to connect with your company. If you’re attempting to market a product, you should also add some information about what it does.
3. Don’t forget to include a call to action (CTA)
A CTA should be included in every email you send, encouraging consumers to connect with your company in a certain way, such as by purchasing a product. Both WooCommerce follow-up emails and regular email marketing campaigns are affected by this. Also, make sure your CTA provides users with the resources they require to take the intended action. If you want them to provide a testimonial, for example, offer them a link to the contact form where they can do so.
4. Make it unique
You can customize follow-up emails in a variety of ways:
- In the subject line, provide the person’s name.
- In the email body, address the client by name
- Send emails to consumers to remind them of items they looked at but didn’t buy.
- Offer customers discounts on similar products to those they’ve already bought.
5. Aesthetics are important
To make your follow-up emails more appealing to the eye, use high-quality photos and graphics. Your email designs should grab and retain the attention of your customers.
In order to provide clients with a consistent experience, your emails should also match your entire brand design.
6. Evaluate your achievements
Keep an eye on how individuals respond to your follow-up campaigns. Is it true that they are reading your emails? Are you getting people to click on your links? Are they interested in purchasing your products? Are they writing reviews or promoting your business on social media?
If a certain email isn’t doing as well as you’d anticipated, take a deeper look at it and ask yourself the following questions:
- Is there a way to make this email more appealing?
- Is it possible to use graphics in the email to make it more attractive?
- How can the contents of this email assist consumers who have done the trigger action?
- Is there any way to make this email more personalized?
Use the information you gained from your answers to revise the email and start the process over.
4 Recommended WooCommerce Email Follow-up Plugins
In this section, we’ll recommend the four best WooCommerce follow-up email plugins that you can take into consideration:
1. Retainful
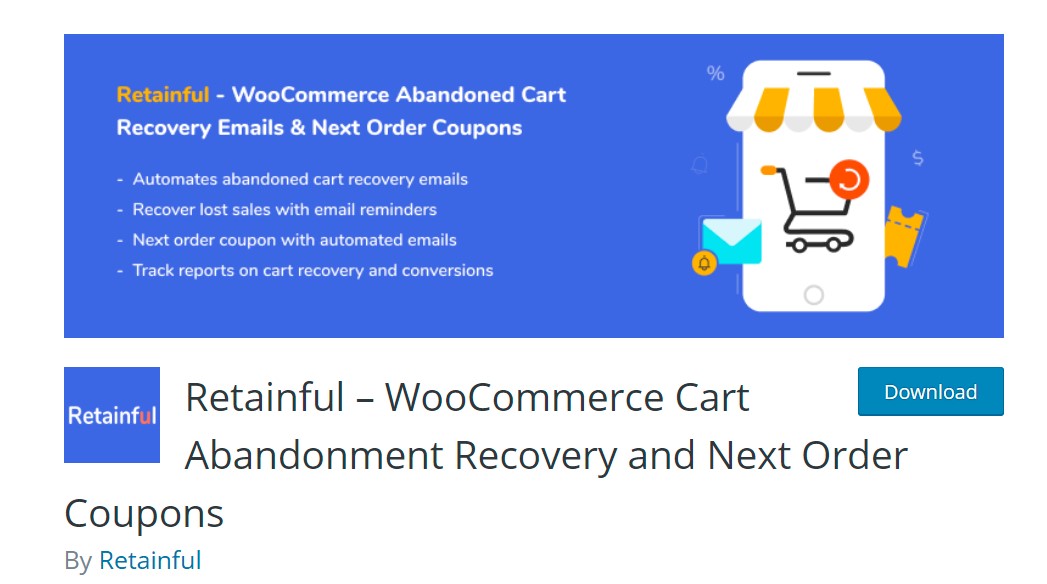
Retainful is a powerful WooCommerce plugin that helps you recover abandoned carts and encourage recurring transactions. When consumers abandon their carts in your business, it can record their email addresses and automatically send a series of email reminders.
Key Features
- Retrieve abandoned carts by sending consumers emails
- Customers can recover their carts with only one click
- With the content-rich editor, you can build an unlimited number of cart recovery email templates.
- Reports on abandoned, recovered, and live carts can be tracked.
- Set the coupon’s expiration date, use limitations, maximum/minimum expenditure limits, or omit sale items.
Price: Free
2. SIP Advanced Email Rules for WooCommerce
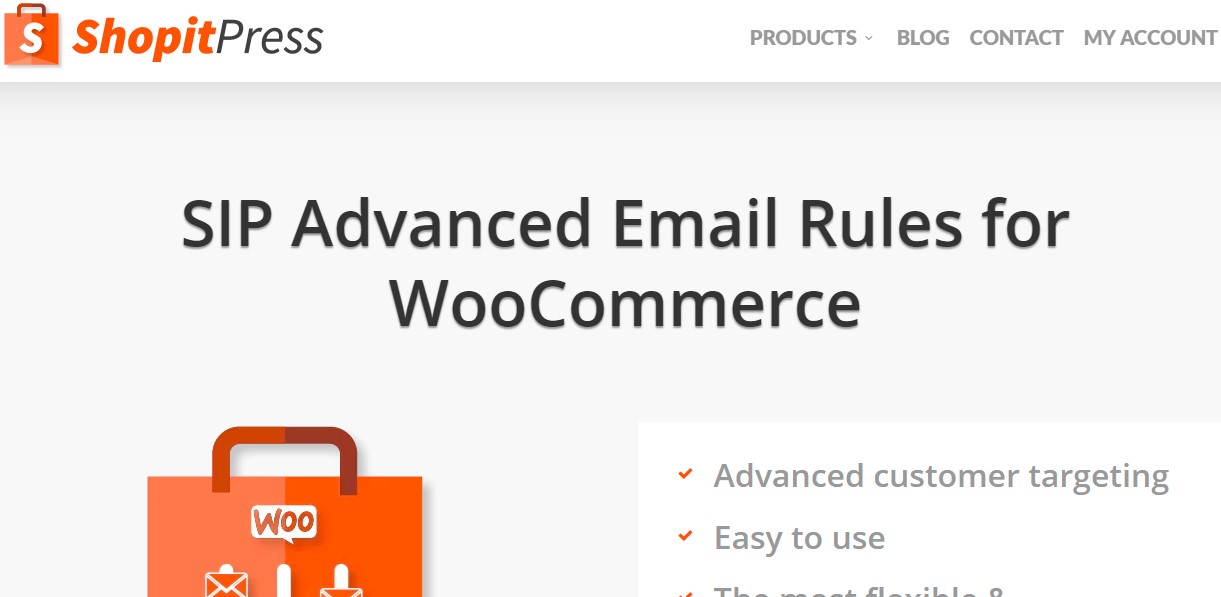
SIP Advanced WooCommerce Email Rules for WooCommerce creates a link between your online store and custom email rules. You can send emails according to particular factors such as the total order amount, the price, the quantity, the type of products, the weight, the location, the shipping method, and so on. Any rules you define are automatically activated by the plugin.
Key Features
- Coupon coupons may be emailed to customers who purchase specific goods.
- Send a follow-up email to customers who have chosen a specific delivery method.
- Send a follow-up email to customers who have chosen a specific payment option.
- Email your customers with purchase tracking information using the best WooCommerce sending plugins
- Provide product information to your customers in a variety of languages.
Price
The (annual) fee for a single site is $29, while the price for an unlimited number of sites is $39. Plus, there’s a deal of $34 for up to five sites.
3. Follow-Ups WooCommerce

The most popular WooCommerce plugin for creating, scheduling, and automating emails is Follow-ups . With minimal manual work, the plugin can increase customer engagement.
This effective marketing tool also allows you to send targeted follow-up emails and boost sales in your WooCommerce store. It automates data-driven drip marketing based on purchase history and consumer activity.
Key Features
- Makes use of the WordPress writing editor, which allows you to write bespoke emails from scratch using free templates.
- Construct campaigns and send messages to your consumers via email or Twitter.
- Access to any scheduled message, which you may alter or remove if required
- Create mailing lists, newsletters, and one-time emails.
Price: $99 per year
4. WooCommerce custom emails
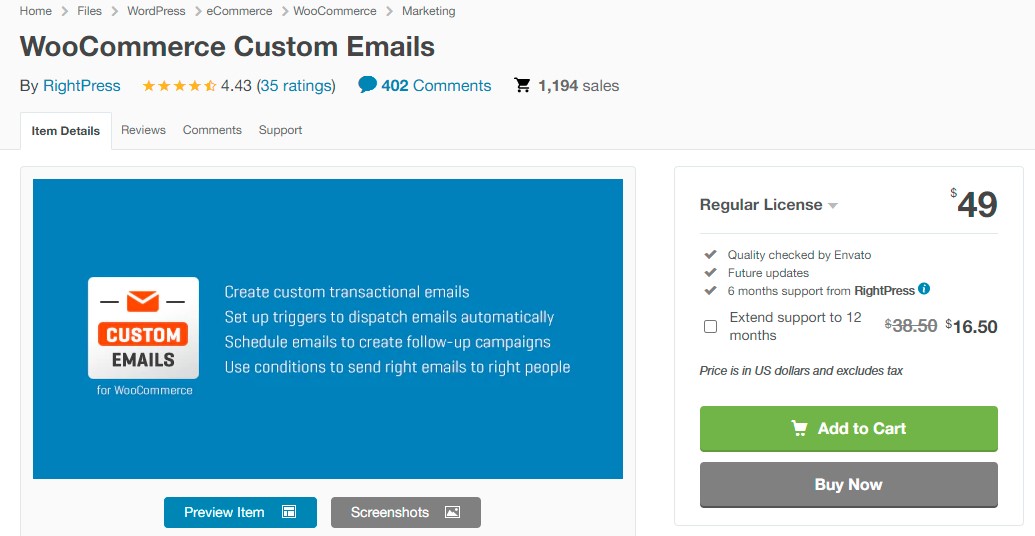
WooCommerce custom emails is a powerful plugin that allows you to send your customers customized transactional emails. The plugin ensures that emails are only delivered to certain targeted clients.
Key Features
- Create custom transactional emails
- Send emails to clients, shop managers, or both
- Format email content with a rich editor
- Insert dynamic content with 37+ macros
- Create reusable content blocks
- Developers can add custom events
- Each trigger can have numerous criteria.
Price
The regular license costs you $49 and the extended one is charged at $249.
Final words
Online businesses are constantly striving for greater success and one of the essential factors that contribute to its success is the good relationship between customers and businesses. That’s when follow-up emails come in handy.
Therefore, we hope that our comprehensive guide to WooCommerce follow-up emails brings you lots of useful information.
If you have any questions, don’t hesitate to reach out to us in the comments section.
Thank you for reading and we’ll see you in the next article.