Are you seeking to print shipping labels for your WooCommerce store, but you don’t know how to do it? If yes, then you have come to the right place.
In today’s article, we’ll give you detailed instructions on how to set up and print a shipping label in WooCommerce.
Let’s dive right in!
Benefits of Shipping Labels in WooCommerce
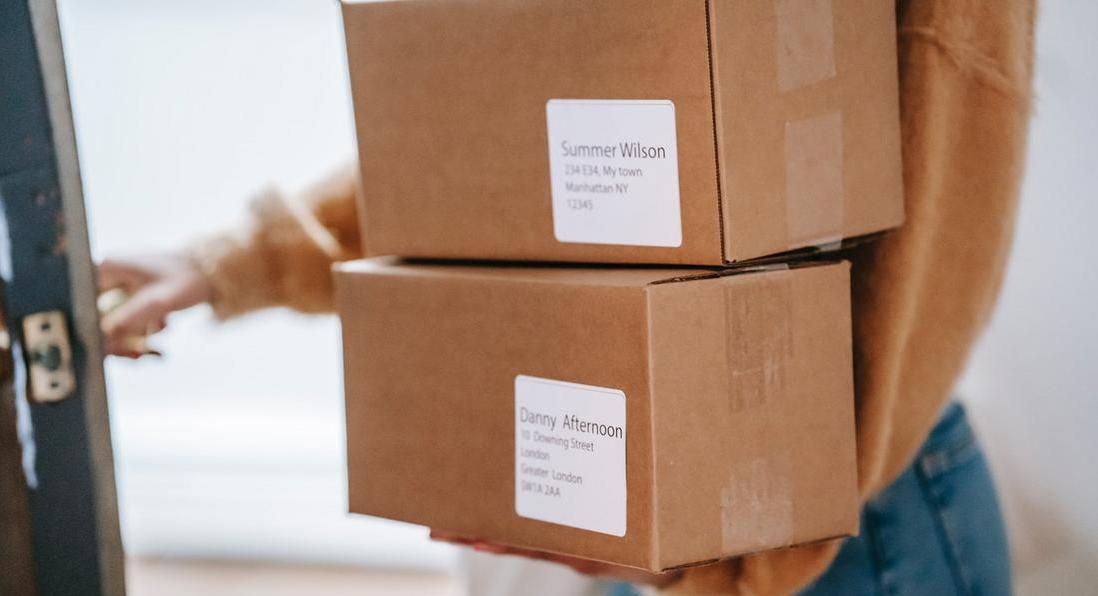
Shipping labels provide critical information for a carrier to deliver a product from its source (your WooCommerce store) to its final destination (the customer’s hands).
The following information is of great importance in a shipping label: postal code, nation, tracking number, date, package quantity, weight, address, validation, delivery type… Shipping labels can also describe the contents, which is essential for overseas shipments.
WooCommerce shipping supports printing USPS and DHL Express Worldwide labels. Printing shipping labels on WooCommerce offers reduced shipping prices, and you can generate ready-to-print shipping labels for USPS and DHL directly in WooCommerce, as well as benefit from WooCommerce’s unique discounts.
How to Setup a Shipping Label in WooCommerce?
Step 1: Install WooCommerce Shipping and Tax
Log in to your WooCommerce account and download the WooCommerce Shipping & Tax plugin.
After that, go to Plugins > Add New > Upload Plugin > Choose File and select the file you just downloaded. Then, click on the button Install Now.
Step 2: Install or connect Jetpack
After finishing installing the plugin WooCommerce shipping & tax, you will have to connect Jetpack to activate WooCommerce Shipping & Tax. (if Jetpack is not yet installed or connected).

To do that, you just need to follow the prompt that shows up as shown in the above image. Remember to use the same account that you use to log into WooCommerce in order to connect to Jetpack. Once done, you will be directed back to your site and a banner will appear to tell you that the setup is complete.

It’s worth noting that if you have already installed and connected Jetpack, you will not have to take the above actions and a different prompt will appear instead.

Step 3: Go to Shipping Labels from the WP admin dashboard
Now that you have successfully activated WooCommerce Shipping & Tax, you need to navigate to Shipping Labels from your WordPress admin dashboard. Simply go to WooCommerce > Settings > Shipping > WooCommerce Shipping & Tax > Shipping Labels.
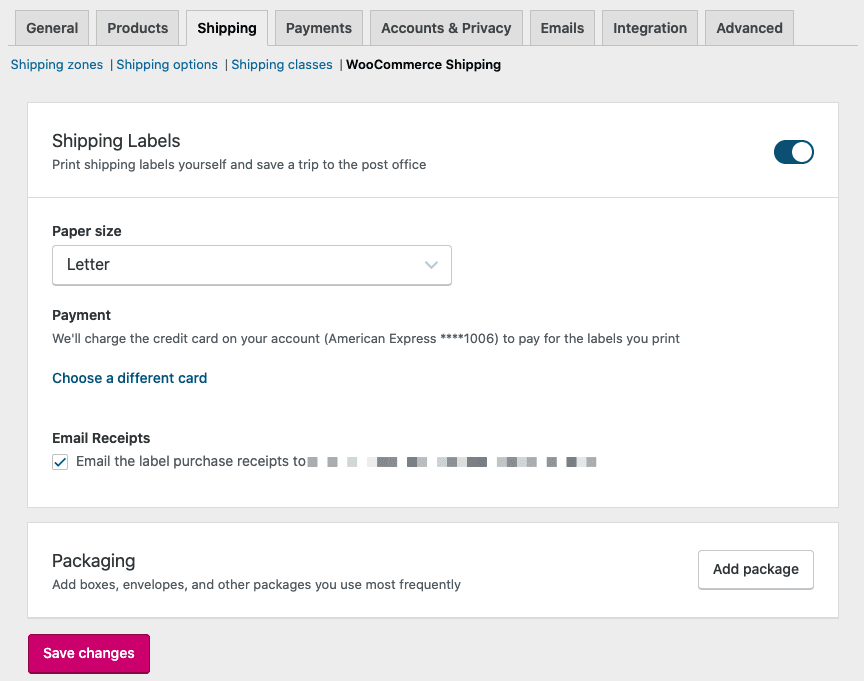
Step 4: Set up Shipping Labels
Turn on the button Shipping Labels and then choose a paper size from the dropdown as Label.
Next, you need to choose a credit card you have on file or add a new card.
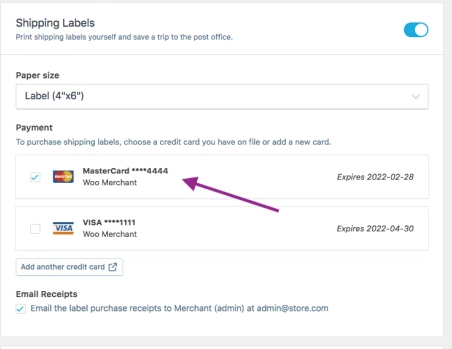
You can also bypass, enter nothing and add a payment method later when you are ready to print shipping labels.
Last but not least, you can check/ uncheck the box Email Receipts.
Once done making all the necessary modifications, remember to save all the changes to finish.
How to Print a Shipping Label in WooCommerce?
Step 1: Go to Orders from the WordPress admin dashboard
First of all, go to WooCommerce > Orders and choose the order that you want to print a shipping label.
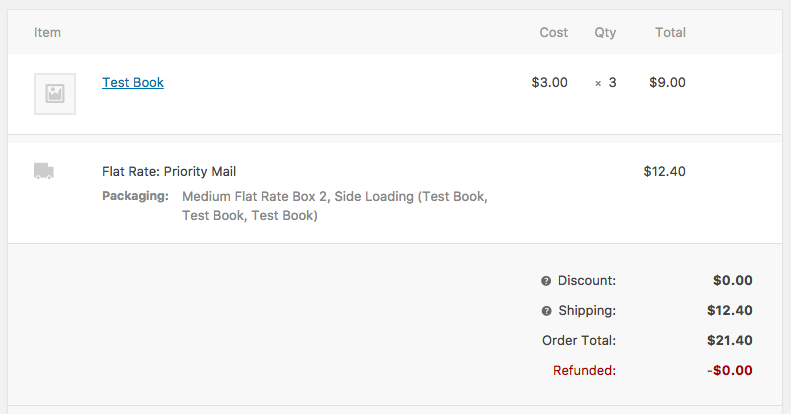
Most WooCommerce shipping method extensions display the customer’s chosen rate and packing information below the order details:
Step 2: Click on Create shipping label
Next, you click on the button Create shipping label.

Step 3: Enter details for the shipping label
If this is your first time printing a shipping label, you need to enter the full address from which you’re shipping. This might be a physical address or a post office box.
Please keep in mind that PO boxes are typically only supported by postal services (such as USPS) and not by carriers (such as DHL Express). When printing a label, if the originating or the destination address is a P.O. box, those carriers will not be accessible. When using a PO box, returns to the sender are frequently impossible.
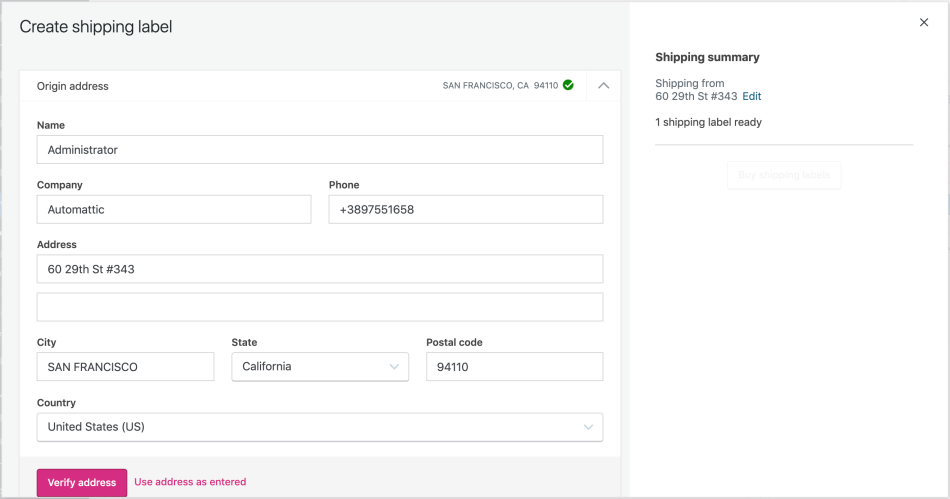
Step 4: Click on Verify address
Now you need to confirm the origin and destination addresses. Once done, click on the button Verify address.
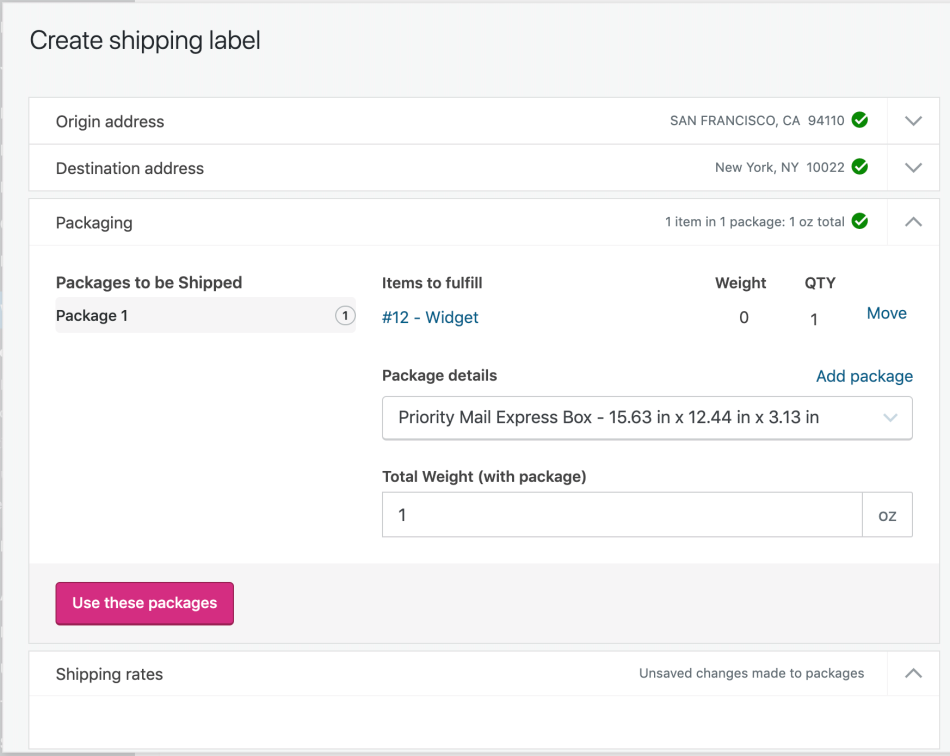
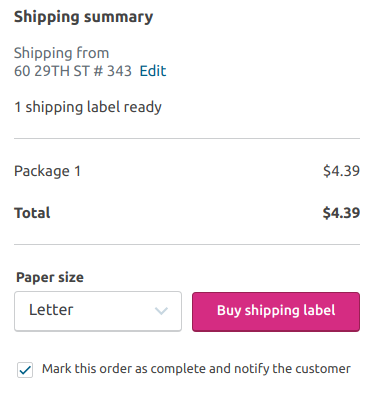
Step 5: Click on Use these packages
Here you need to confirm the Package information. You can view the full packaging by clicking on the dropdown.
If all the information is correct, please click on Use these packages.
Step 6: Choose the shipping rate
It’s time to select the shipping rate from the options available and you can also choose to have an adult signature required.
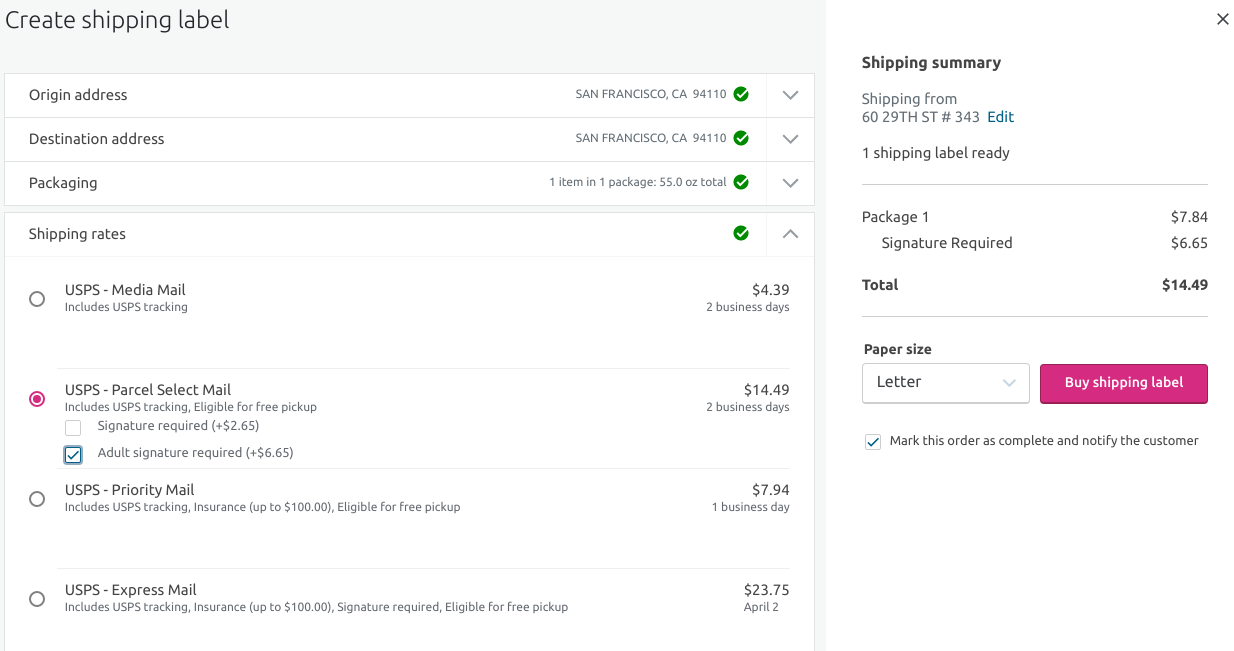
Step 7: Click on Buy shipping labels
Since you have already had a payment method on file at WordPress or have just added a credit card in the previous setup process, you will just need to click on the button Buy shipping label to move on to the next step.
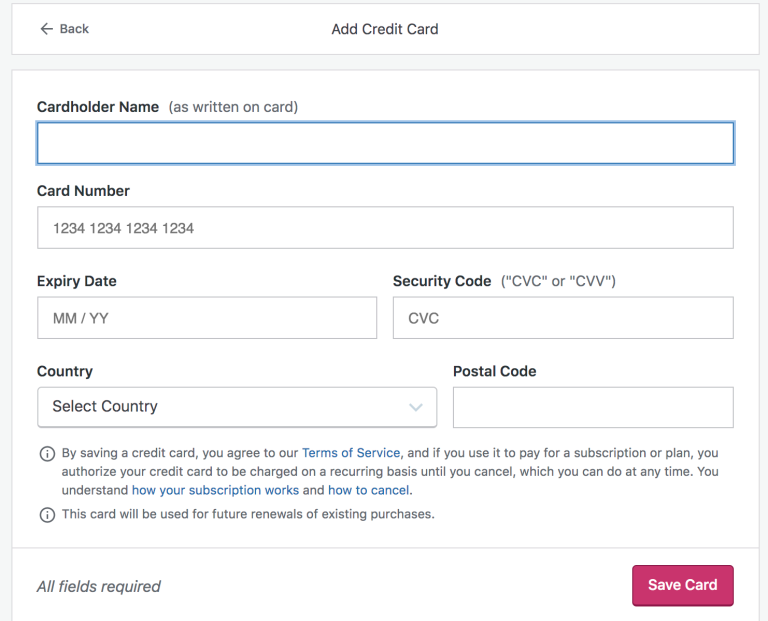
However, if you have not had a payment method or skipped adding a credit card during setup, you will have to add a credit card now by clicking on Add credit card.
Then, you will need to fill in all the required fields in the Add Credit Card screen, and once done, click on Save Card. When you finished entering a payment method, the button will switch to Buy shipping labels and you’re good to go.
Step 8: View the shipping label
After selecting Buy shipping labels, a display will show up automatically and you will be able to view the shipping label in Print mode.
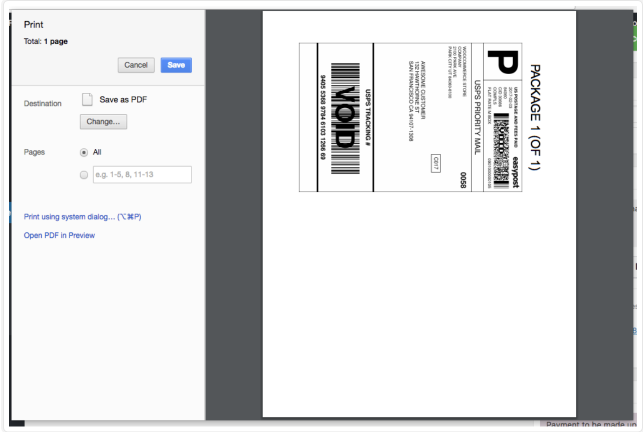
Step 9: Print the shipping label
Click on Print to start printing immediately. Or you can click on Save to save the label, continue with other orders, and then print them all together.
One quick note for you is that if you’re sending an international package, there will be an additional step once you’ve chosen the package size.
If a customs form is necessary, you will be asked to fill out the essential details for each item you are sending, which may include the HS Tariff numbers:
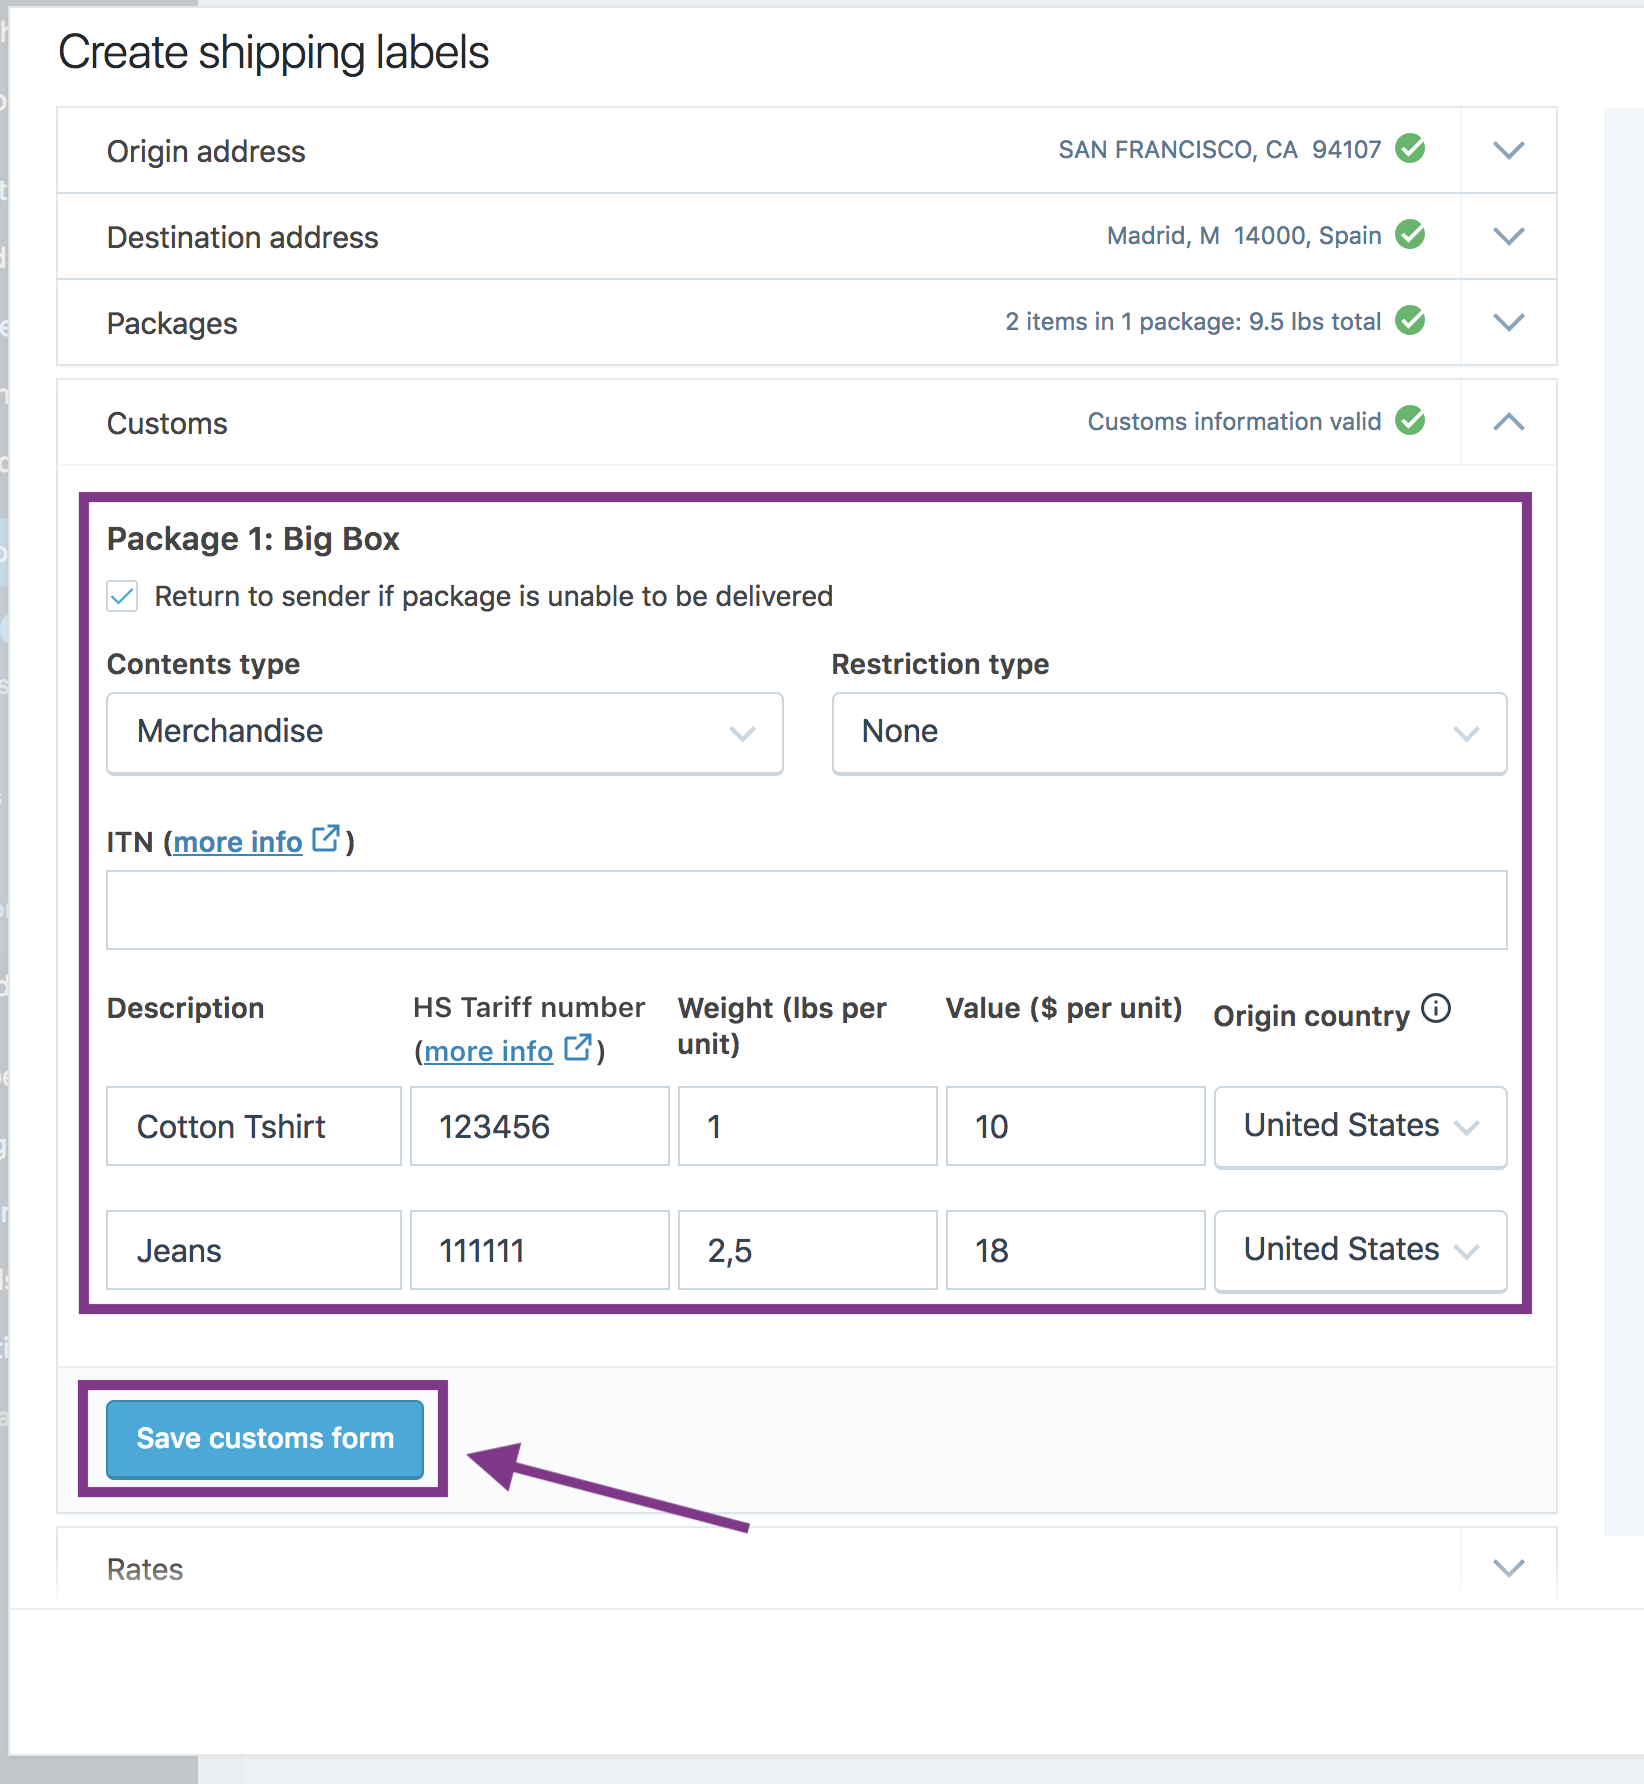
Some shipments will demand the printing of separate customs documents.
- USPS: For certain international USPS shipments, a single shipping label will be divided into three sections (proof of payment, customs declaration, and dispatch note). You’ll need to place the three components in the correct order inside a window pocket given by the USPS in certain situations.
WooCommerce Shipping will instantly send your customs information online for countries supported by DHL’s Paperless Trade.- DHL: For countries that DHL’s Paperless Trade does not support, you must print the customs documents. After printing your label, you will be requested to print the custom document. Custom documents can always be found and printed from your order page. In the Shipping Label meta box, select the three ellipsis menus. The only thing left to do is print the shipping label.
Once the custom documents have been printed, they must be attached to the box using a plastic sleeve. DHL and USPS both offer free plastic sleeves for this purpose (or you can pick them up from the post office).
3 Best WooCommerce Shipping Plugins for Printing Labels
In this part, we’ll introduce to you the three WooCommerce shipping plugins that support printing labels.
1. WooCommerce Shipping (by Jetpack)
WooCommerce Shipping powered by Jetpack is an official Automattic/WooCommerce plugin that allows you to print and pay for USPS shipping labels directly from your WooCommerce dashboard.
Key Features
- Easily print out and pay for shipping labels
- Automatically include the tracking number
Price
While WooCommerce Shipping is free, to calculate correct prices, you’ll need to connect it with the USPS Shipping Method plugin, which costs $79.
You’ll also need to utilize Jetpack in your store because the plugin’s core functionality demands it.
2. WooCommerce FedEx Shipping Plugin with Print Label
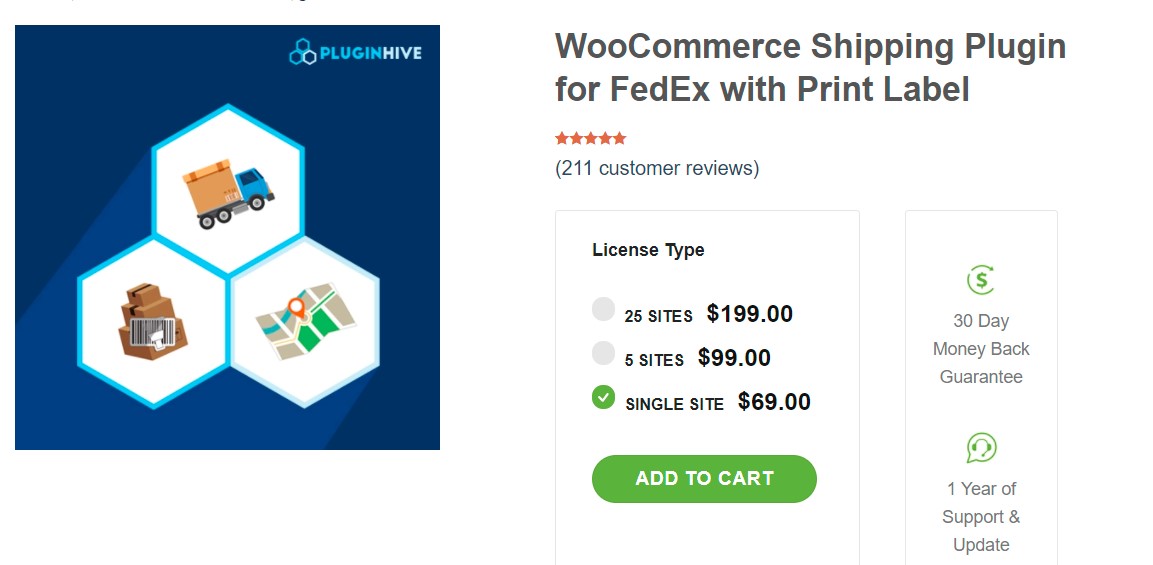
WooCommerce Shipping Plugin for FedEx with Print Label is a WordPress WooCommerce plugin that allows you to fully automate FedEx shipping. The plugin displays shipping costs in the cart/checkout page, enables you to pay for postage and print labels from inside WooCommerce, automatically identifies boxes to pack the products, and lets you track shipments.
Key Features
- Generate FedEx return labels
- Get assistance from the PluginHive support team for FedEx Label Evaluation
- Real-Time FedEx Shipment Tracking
- Custom Email Notifications to Customers & Store Owners
- Show delivery estimates for FedEx Services
Price
WooCommerce FedEx Shipping Plugin with Print Label costs you $69, $99, and $199 for a single, 5 sites, 25 sites licenses respectively.
3. WooCommerce Print Invoices and Packing lists
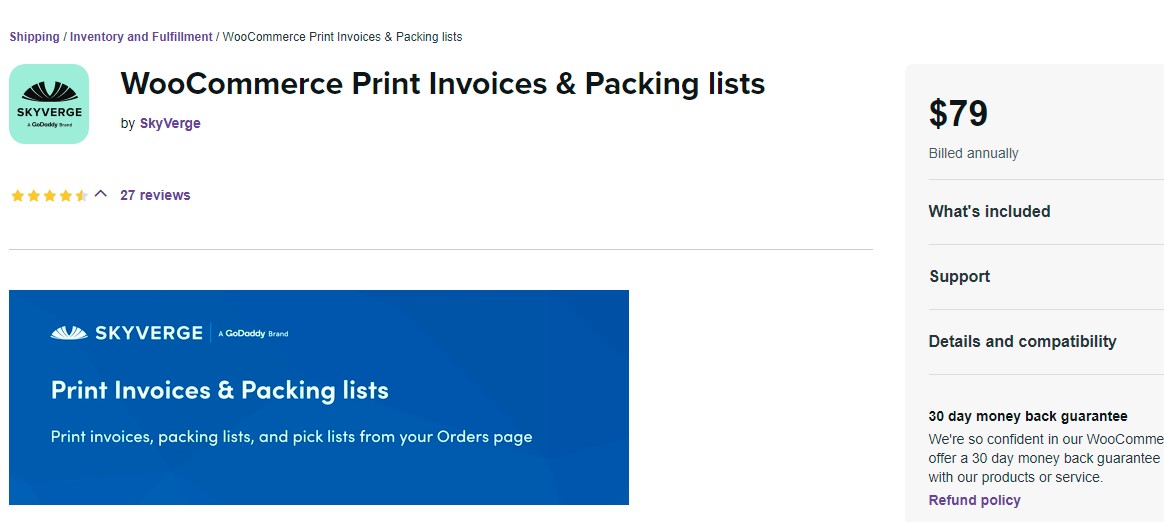
WooCommerce Print Invoice & Packing Lists is the ideal tool for managing invoices, packing lists, and pick lists for your WooCommerce store. Although this plugin does not help you with printing shipping labels, it does allow you to easily print documents for orders directly from the Orders page (individually and in bulk).
Key Features
- Rapid Single and bulk order processing
- Easily print or email invoices on a per-order or bulk basis. Only after an order is paid for will emails be issued.
- Using the WordPress Customizer, you can customize the design and information of your document with a live preview – no coding required.
- Sort packing list items by category to expedite order fulfillment.
- Use sequential invoice numbers or WooCommerce order numbers as your invoice numbers
Price: $79 per year
Final words
Hopefully, you can pick up some useful information from our in-depth article about how to set up and print shipping labels in WooCommerce.
Do you have any questions about WooCommerce shipping labels? Do share with us in the comments section below!
Thank you for reading and we’ll see you in the next article.