Emails have obviously become a major channel to convey communication between store owners and customers on the eCommerce platform. If you own a WooCommerce business, using emails to keep in contact with consumers plays a key role in providing their best services with amazing experiences. However, as you know, email templates available in your WooCommerce are not varied enough to include your content and designs.
That is why store owners are keen on customizing default emails. But, for some people, it is not a piece of cake to do so. By understanding your needs and concerns, we have come up with useful instructions on how to customize email templates in WooCommerce. Let’s get started and you could benefit a lot from it.
How to customize email templates in WooCommerce
By customizing your email templates, you could be able to include the identity, coupled with personality, into your brand. Hence, it will match other emails that you send. In particular, there are several ways to help you work with email template customization, thereby improving your online store and boosting customers’ experience.
1. Utilize the settings within WooCommerce
Firstly, we will make use of the settings within your WooCommerce dashboard. WooCommerce comes with some options for customizing your email templates. This way is easy to follow because you only need to perform several activities within your WooCommerce.
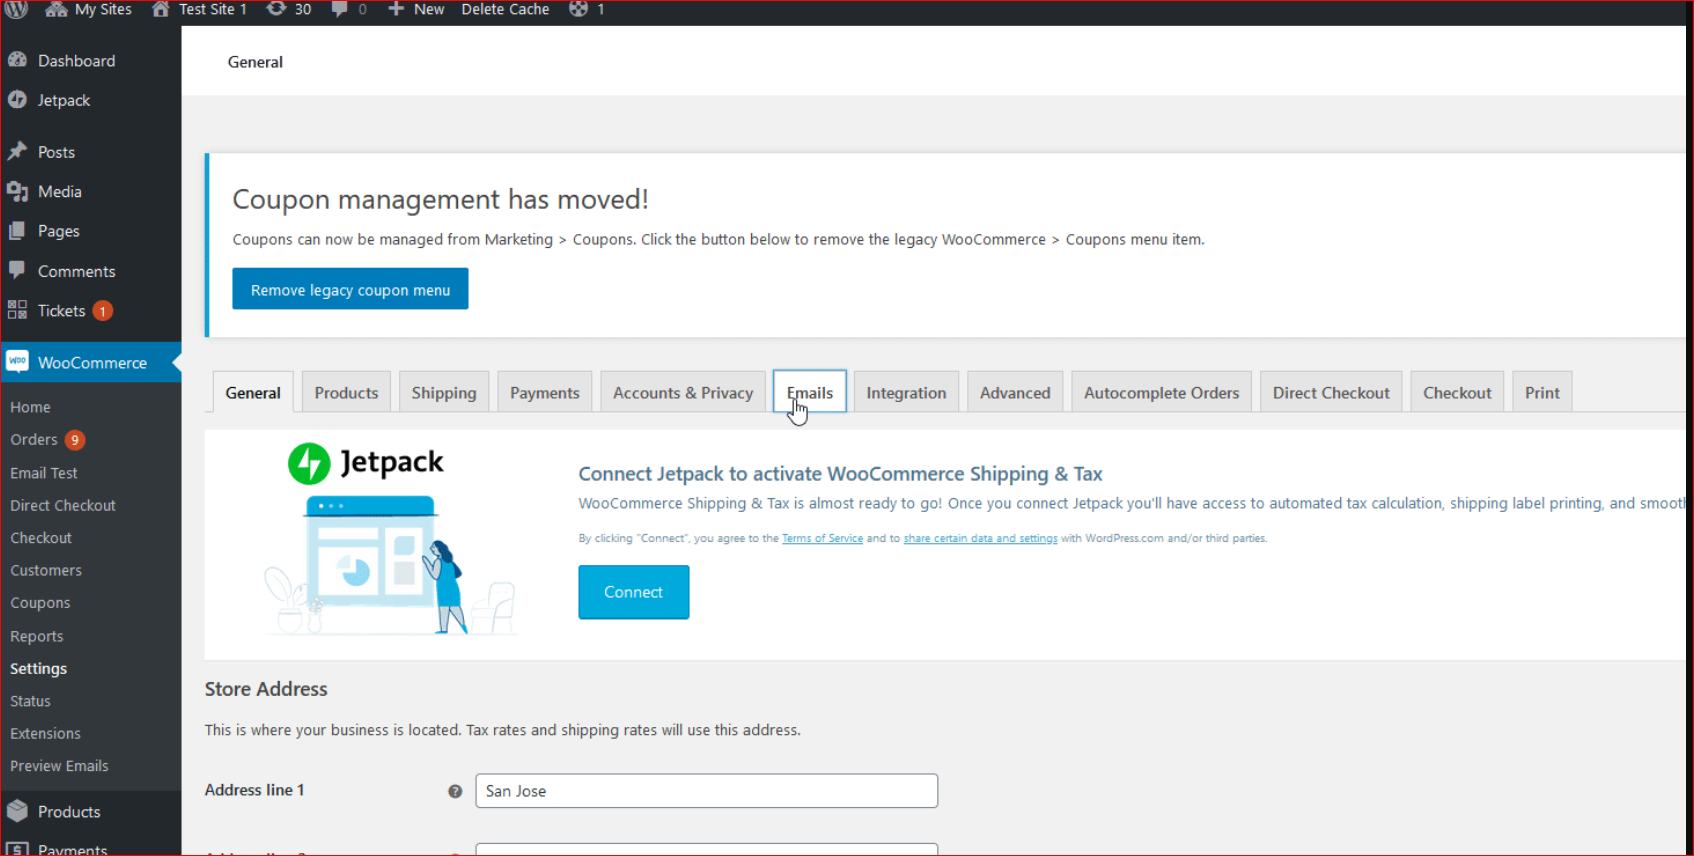
Step 1: Head to WooCommerce settings
By going to your dashboard in WooCommerce, you could change the content, heading, and subject of every transactional email individually.
Moreover, personalizing templates of your emails by modifying background color, base color, footer text, header images, and so on is what you can also perform. To do that, head to your “WooCommerce” to select “Settings” before choosing “Emails”.
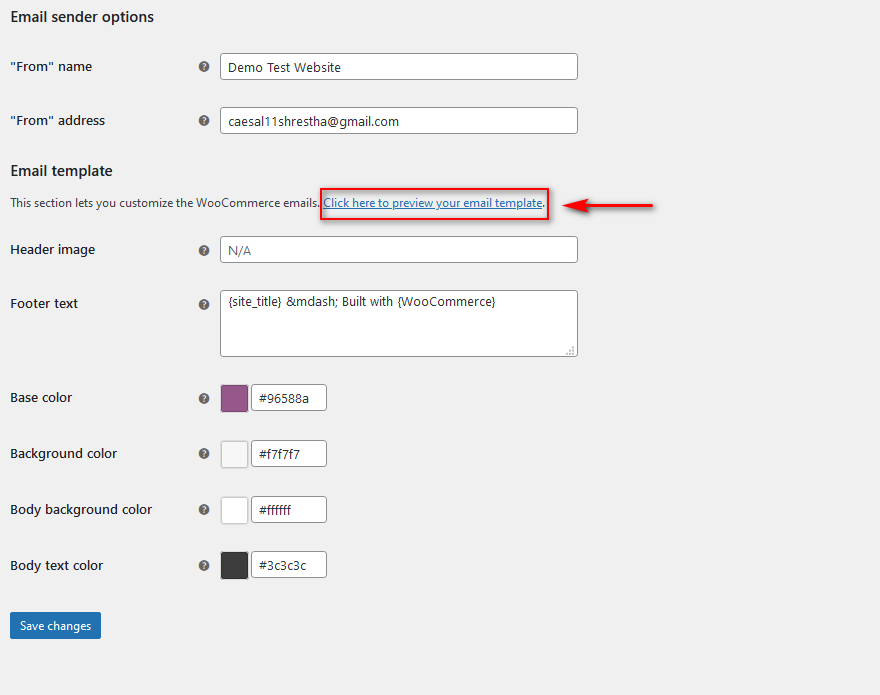
Step 2: Change options of the email sender
When you are here, you could also modify the option “Email sender”, including “From” name as well as address. The next step involves customizing the templates for your email. This consists of adding footer text, background color, and header images.
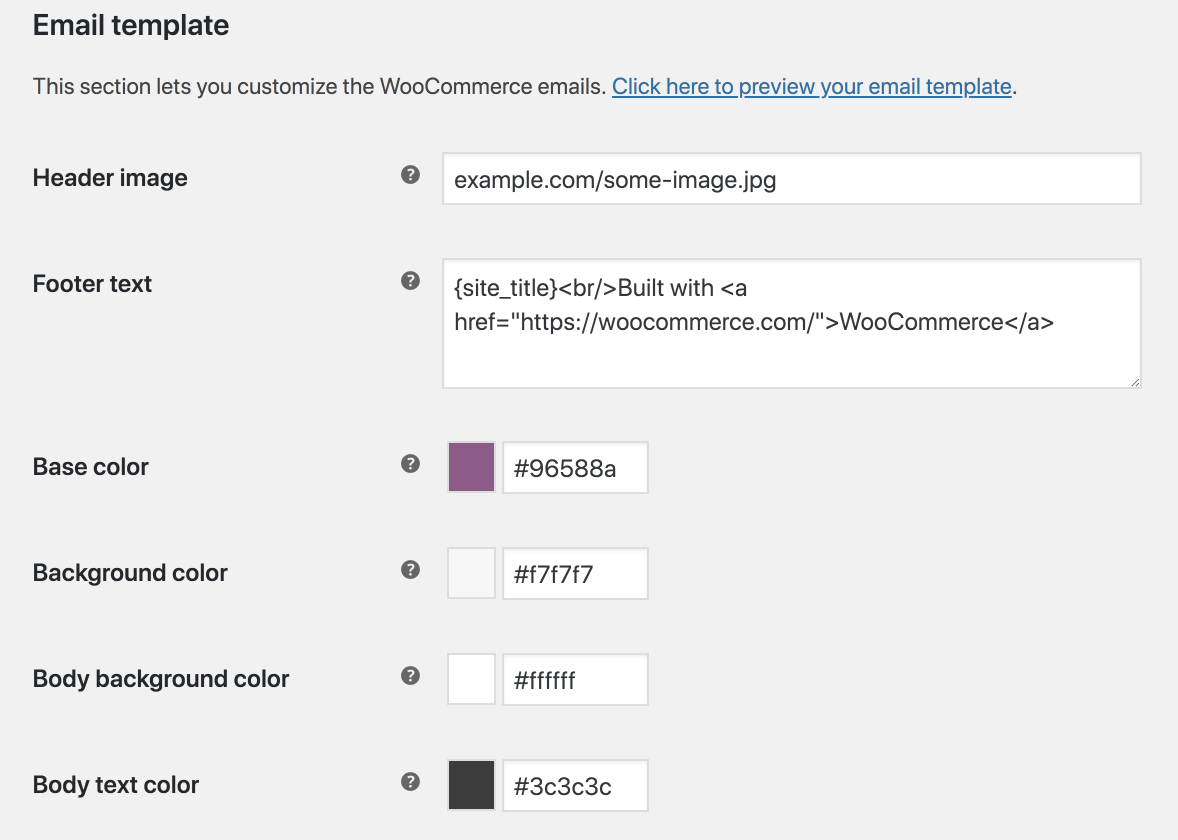
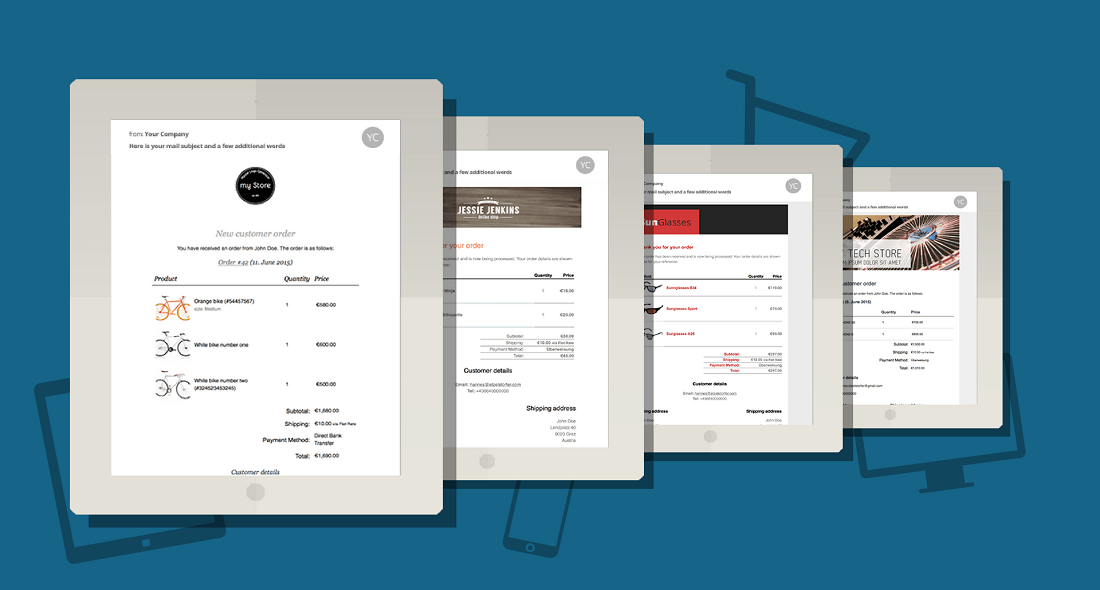
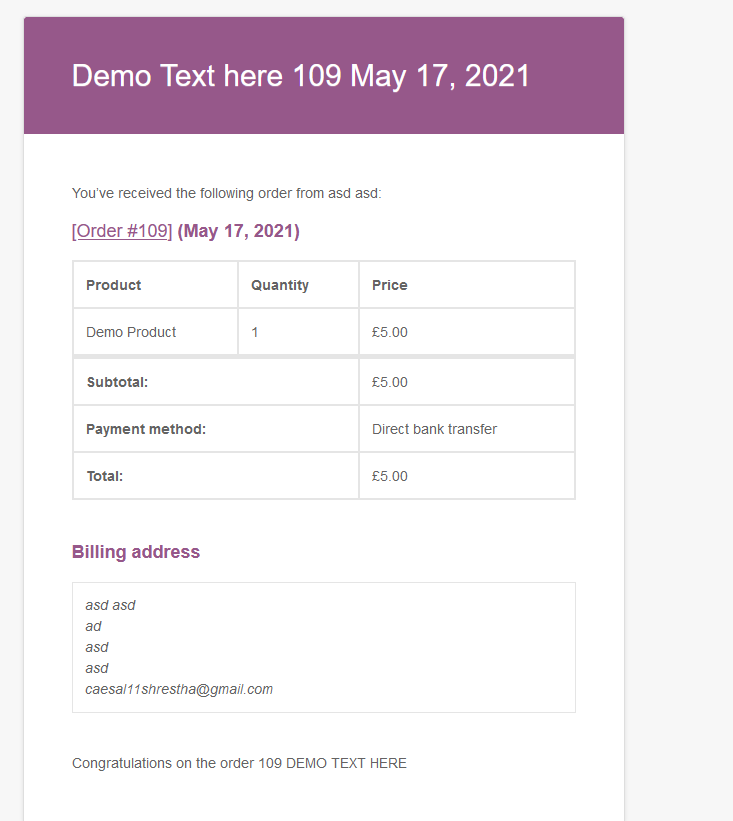
Once everything has been changed, click on the link named “Click Here to Preview Email template” to witness how the templates of your emails will look.
Let us take an easy-to-understand example. Your email template will look like below if you go with the above-said options.

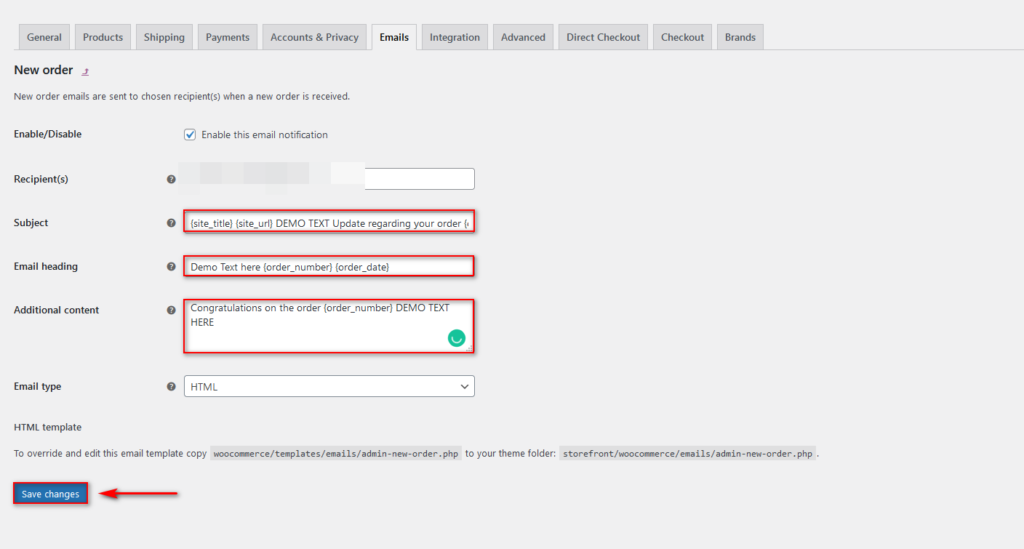
Step 3: Edit the templates of a transactional email
Besides customizing email templates, editing templates is also an effective method to make them more appealing to customers. In doing so, your task is to hit the button “Manage” that is near which transaction email is to be customized.

You could choose to edit such items as Email Type, Additional Content, Email Heading, or Subject. Next, move on to hover over the icon “?” to see some placeholder strings. And these strings could be used for this field. By doing this, you could implement the customization of how this field is about to show up within the transaction emails. See the below screen:
Step 4: Preview the email template
To be more specific, if you customize your email template like the above-mention way, it will look like as below:
Using placeholders gives you an opportunity to customize the content of your email, thus improving customer relations as well as boosting business transactions.
2. Use code or the child theme
Another way to customize your WooCommerce email templates is to use code or the child theme. To perform in this way, your job is to copy the template of your email and add it to the theme, then adjust it directly.
Perhaps, using code as well as your child theme can be the most complicated option. But it is still useful if you are good at code or keen on working with your child theme. When you make up your mind to go with this way, there are two important things you should bear in mind:
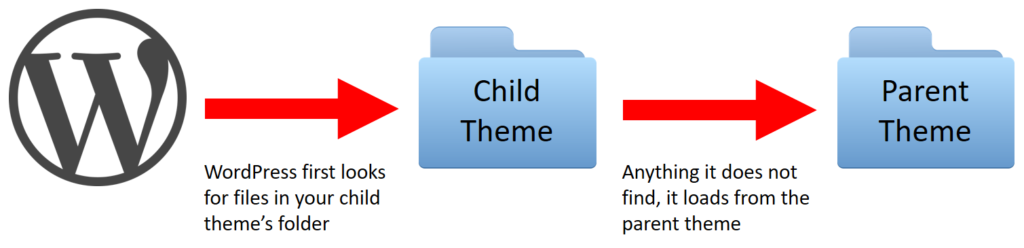
- Using the child theme is a must: It is critical to use the child theme to customize your email templates. Or else, if you choose to use a parent theme, you will lose any alteration or modifications when it updates. This means that any changes you have made to the email templates in WooCommerce will disappear.
- Make sure your email templates will be kept up-to-date with any WooCommerce updates: As WooCommerce will regularly update so that you should keep your email templates always up-to-date with all changes. Otherwise, you need to seek assistance from a developer.
Keep going with finding a code for your email templates in WooCommerce in wp-content/plugins/woocommerce/templates/emails. Remember that you should not make any modifications to your email templates here. Instead, what you should do is copy this file path and paste it to the child theme.
For instance, in case “mailpoet-child” is what you call the child theme. Then, the path that leads to your child theme will be wp-content/themes/mailpoet-child. Adding the folder to this child theme that is called “woocommerce” will give you a path wp-content/themes/mailpoet-child/woocommerce. After that, you will keep adding another folder named “emails” and you will then have a path like wp-content/themes/mailpoet-child/woocommerce/emails.
Now, you have a path for the email templates in your WooCommerce. Your next task is to copy WooCommerce’s files to the child theme to make the edits. It is a fact that each email comes with a template. And there exists a template to keep general styles in control. This template is known as “email-styles.php”.
Here, you could notice variables, along with CSS for colors. You need to copy that file and paste it into the child theme in case you are fond of updating or unifying it across WooCommerce emails.
Another no less vital thing is that changing emails is not for average WooCommerce store owners. So, if you are not a developer, you are highly recommended to make use of a plugin to do that. Alternatively, it should be done by capable developers.
3. Use a plugin
As we said previously, if you are not good at code or are not a developer, using a plugin is the utmost method. So, you do not need to do it yourself.

Step 1: Install and activate Email Template Customizer for WooCommerce
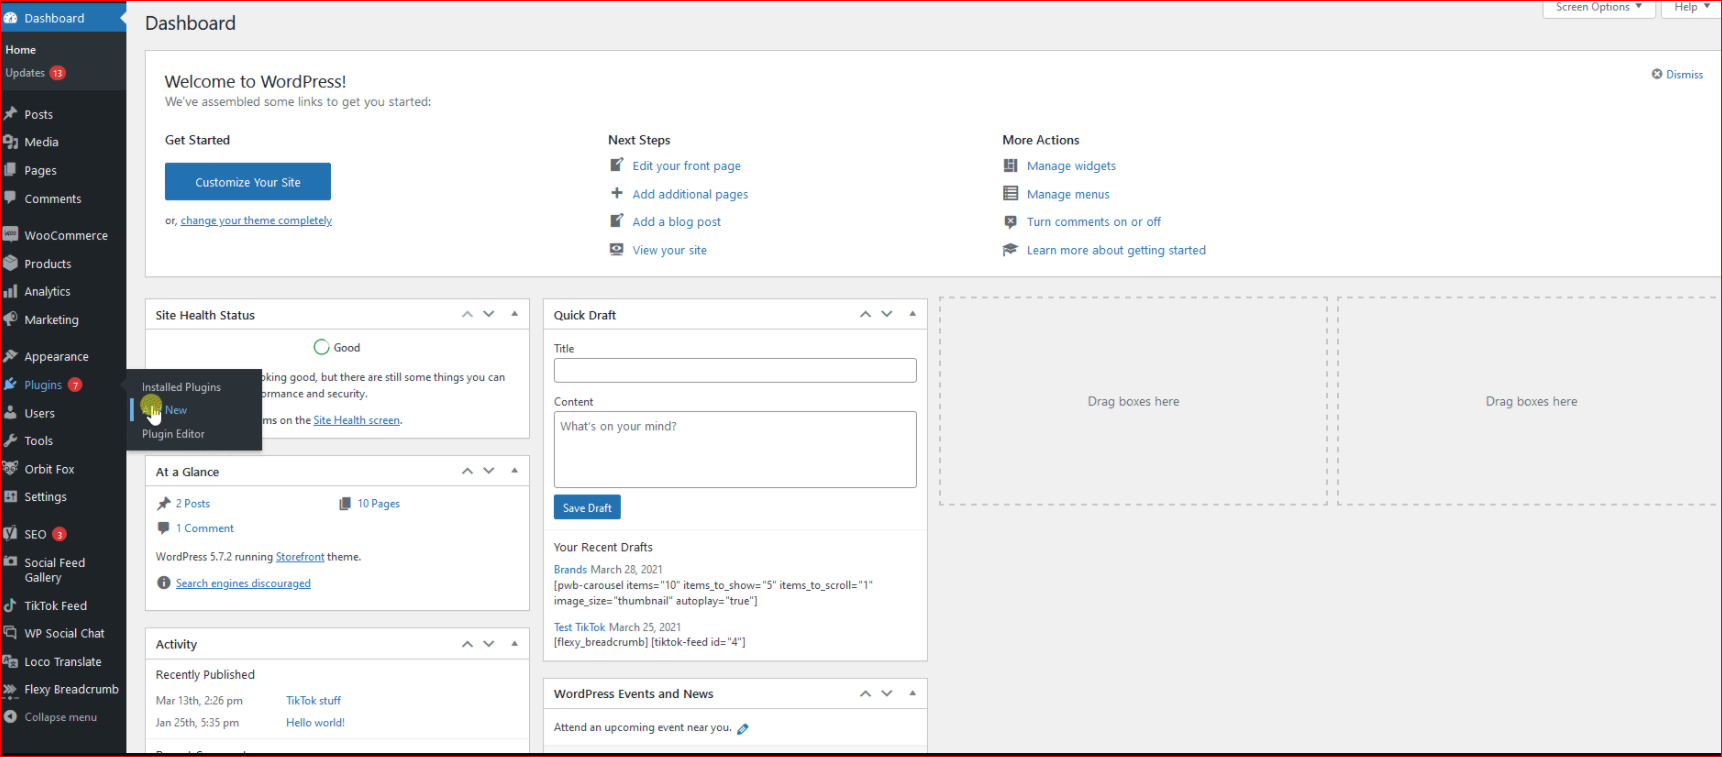
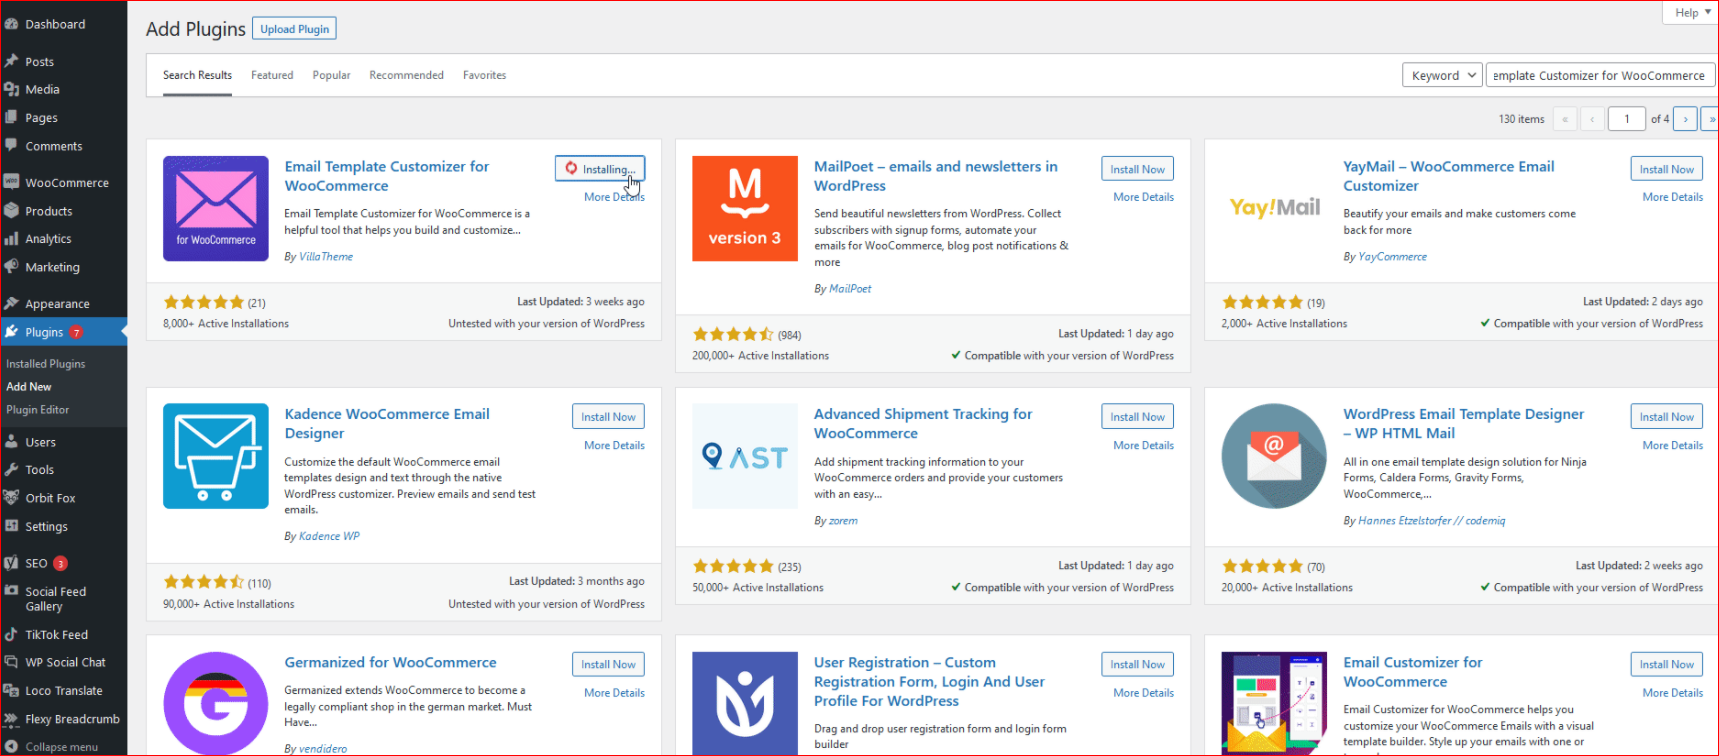
To install this plugin, you will head to your WooCommerce dashboard. Scroll down a bit you will see the section “Plugin”. Click “Add New”. Check out the screen below:
Then, you could use your WooCommerce search bar to seek the plugin Email Template Customizer for WooCommerce.
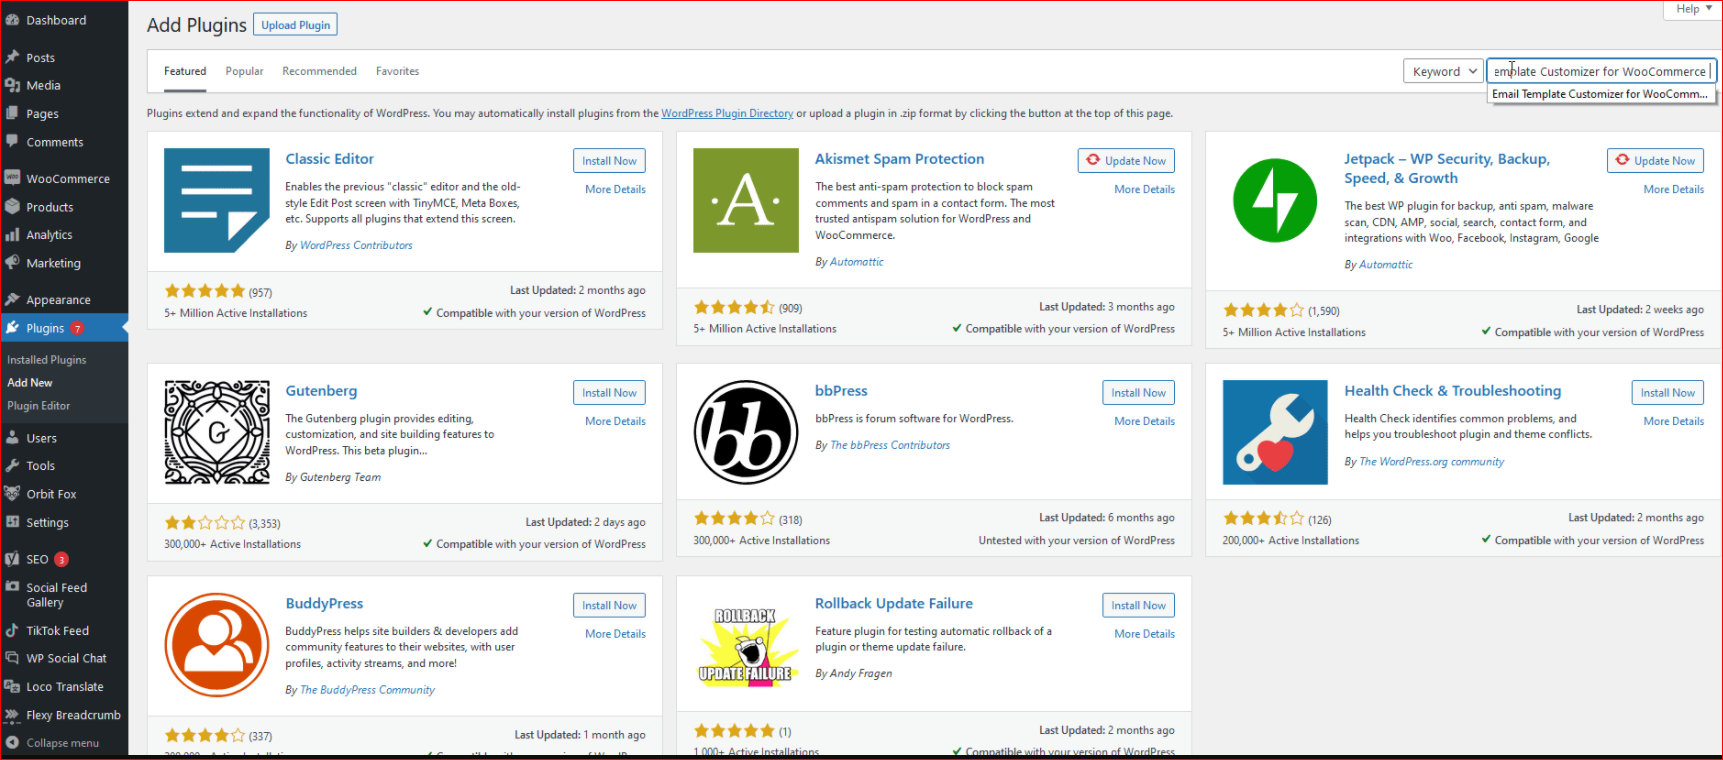
After that, when the plugin appears, your job is to click “Install” before clicking “Activate” to get the plugin enabled for use.
Step 2: Customize the email templates
As soon as the plugin has been activated, the next thing to do is to head to the option “Email Templates”. This option lies on the sidebar of your WooCommerce dashboard. When you come there, you can select any email template that you are going to customize. What is more, selecting the default template, a new type of template or a certain transactional template is what you could do.
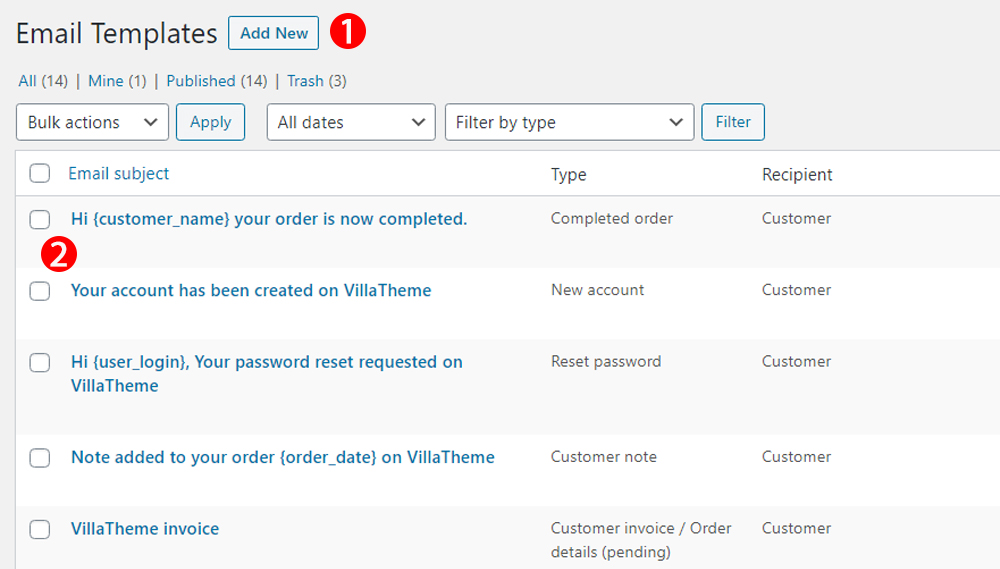
Next, how could you customize your default template of emails? It is easy. Simply hit on the button “Edit” that is below the type “Default Template”. After that, you will head to the section named “Email Customizer tool”. See the following image highlighted in red to understand what you are about to perform in this part.
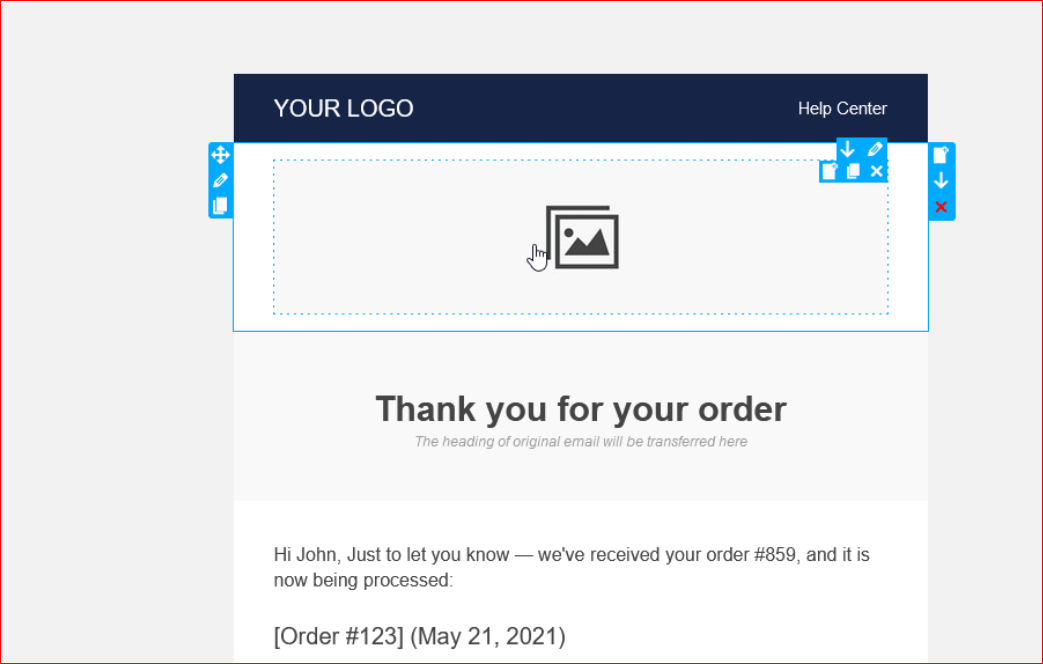
Step 3: Make use of an Email Template page builder in Email Customizer
Have you ever used such as drag-and-drop page builder as “Elementor”? If yes, you could be acquainted with the interface. You can get the email’s layout or elements customized. Furthermore, you could even add some new elements or customize your existing content to your emails using your left sidebar.
Now, it is time for you to add one header image. Your task is to add it to your email template, thanks to adding a 1-column layout. Next, move on to drag this layout simply to your middle editor, then select where you are keen on placing it.
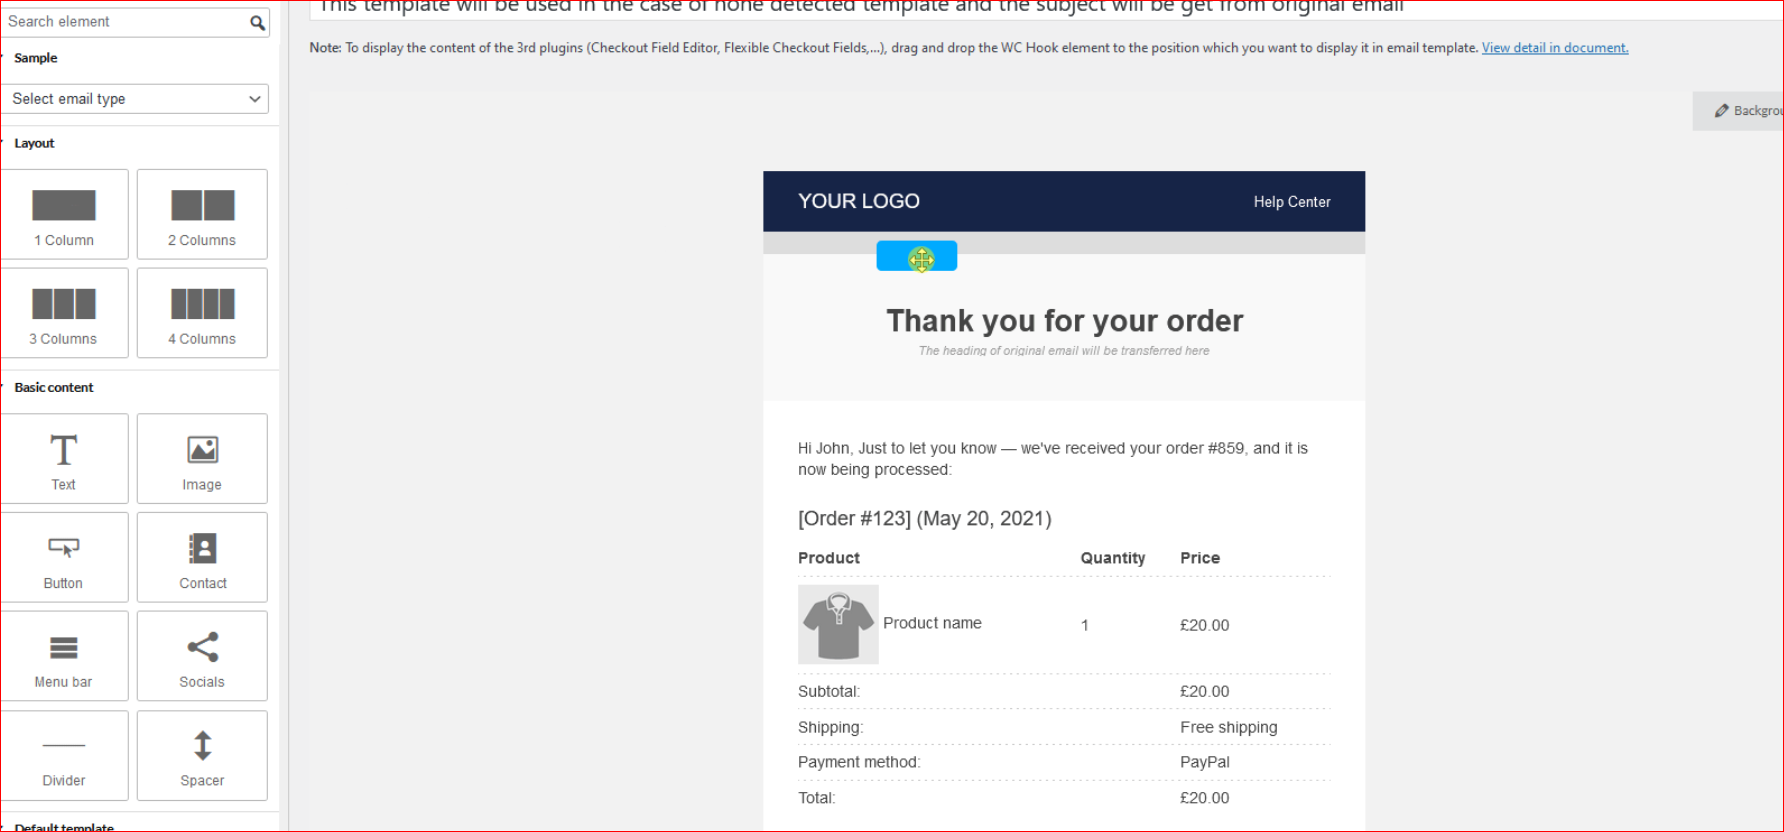
Keep going with the next step to add the image with the use of an “Image component”. To do that, you need to hit on the button “Components” that lies on your left sidebar. Once you are done, go ahead with selecting this image component and drag it to the column as indicated below:
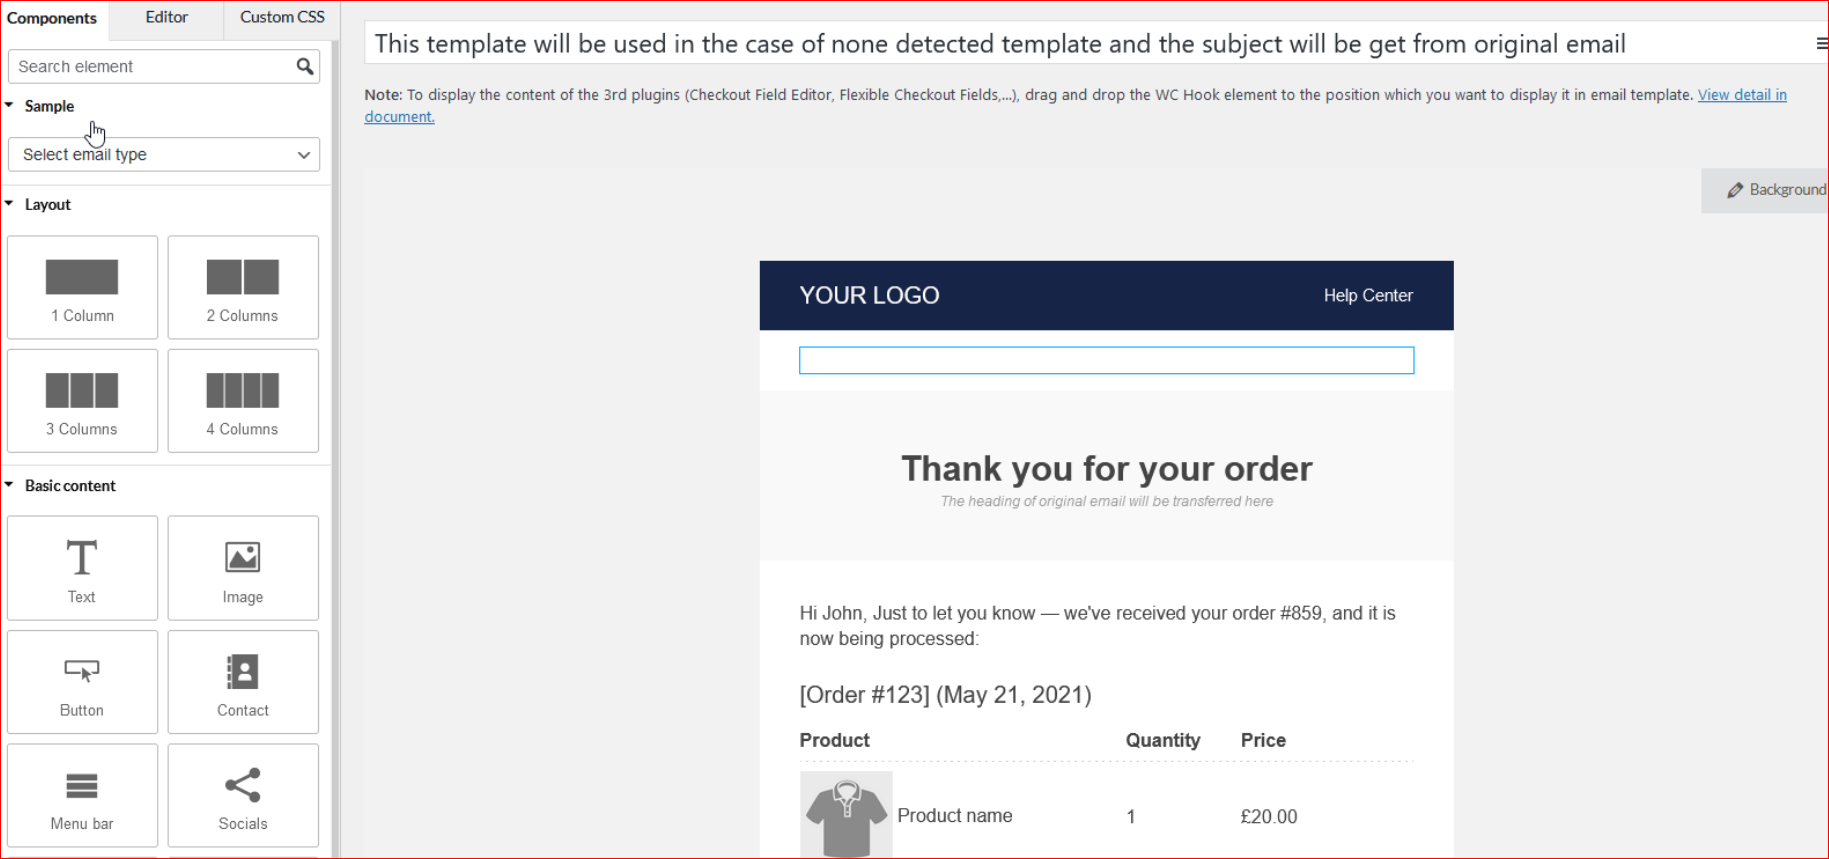
Move to another required step to choose the image that you are going to display. Right after selecting the image, you could notice a new email template header image. Additionally, you can even do more than that. You can add social media logos, icons, buttons, or make some changes involving how the content of your email can be displayed.
This plugin also provides a great number of features to assist you in designing an awesome WooCommerce email template.
Top 3 plugins to customize emails template in WooCommerce
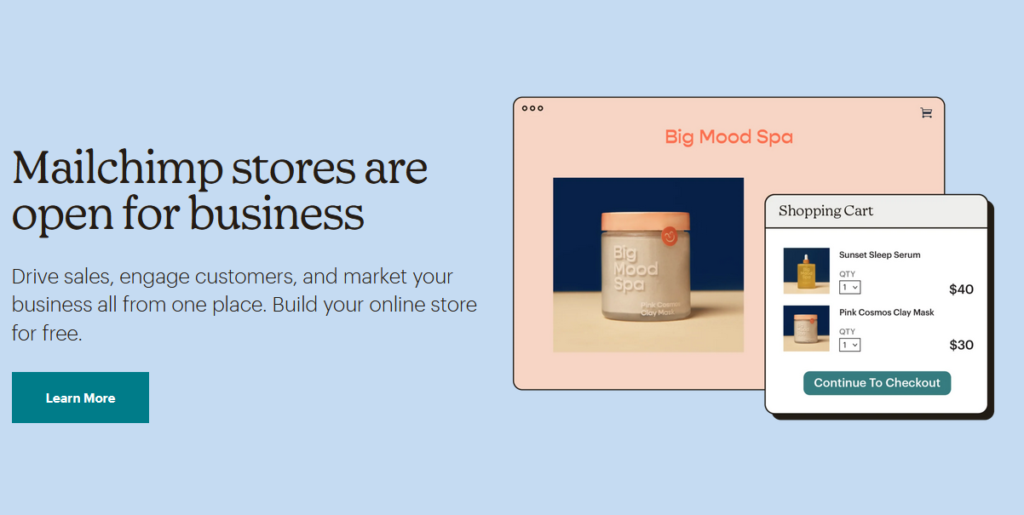
1. MailChimp
MailChimp has a reputation for being one of the best marketing-driven tools for your WooStore. With tons of options and advanced features, you can now customize your email templates in WooCommerce easily and quickly. Thanks to this plugin, creating a custom template of the email becomes much easier than ever. To be more specific, the drag-and-drop page builder is extremely friendly to its users. Therefore, you could access a simple method for handcrafting any email templates.
Main feature
- Be the most famous WooCommerce marketing tools
- Build both transactional and marketing emails to offer help and support to your possible customers and leads
- Come with a resourceful collection of data
- Be also to provide data such as browsed items, the abandoned carts, as well as design emails accordingly
Pricing: Start from $59 each year
2. Jilt
Another not-to-be-missed plugin that you will find useful for customizing your WooCommerce email templates is Jilt. The ability to optimize and automate email marketing, it could assist you in boosting your revenue significantly. Moreover, Jilt even gives you a chance to create media elements for your newsletter emails. So, you could sell your WooCommerce product better.
Main features
- Be compatible with email templates in WooCommerce fully
- Come with options to help users override as well as customize their default email template
- Be able to create custom-designed emails, then send them via Jilt rather than WooCommerce
- Provide advanced analytics features, the ability to retrieve abandoned carts, and set up discount codes
Pricing: Start from $29 each month
3. MailPoet
The last plugin to appear in this list is MailPoet. The email customizer feature in MailPoet lets you edit the email templates in your WooCommerce by making use of great marketing functions. Owing to the amazing email marketing, coupled with automation-centric design, it is undoubtedly among the best email plugins. You could use MailPoet to integrate every function as well as design a template with all the needs of your business.
Main feature
- Be able to design or customize the default template of emails
- Install automation elements as well as additional emails for abandoned cart
- Come with myriad personalization options
- Be friendly to the user thanks to the newsletter builder
Pricing: Start from €13 each month
Conclusion
Do not hesitate anymore to customize your WooCommerce email templates so you could add the relevant information. Hence, you could make your WooCommerce store stand out of the crowd, thereby improving customers’ experience.
As there are different ways to personalize your email templates, we suggest that you take ideas from our post and figure out which way would work best for you. Hope that you could enjoy our article and know how to customize email templates in WooCommerce and achieve a booming business. Share those words with those who are concerned and follow us for further awesome eCommerce tips.