Bringing the best shopping experience is the final goal and the core factor leading to the rise in every online store’s revenue. If you are looking for an application to do so, then you have come to the right place. With WooCommerce Infusionsoft integration, your customers will be able to update their information automatically without the need to type multiple times whenever they enter your website.
In today’s article, we will be discussing the advantageous side of Infusionsoft, explaining why you should install them and help you on How to set up the WooCommerce Infusionsoft connection. Keep reading to find out more!
The benefits of using Infusionsoft

If you still use conventional email marketers, free or paid, you must consider moving to Infusionsoft. The features are worth the monthly fee and save you money in the long term:
- User-friendly interface: Infusionsoft offers one of the finest developed user interfaces in the automated marketing sector. Their graphic campaign builder makes creating enjoyable and straightforward even the most complicated of marketing sequences.
- Supportive team: Infusionsoft is highly appreciated for the quality of its customer care. If you have ever bumped into any problems while setting up your account, they are likely to be solved within a few minutes.
- Connection and API: Thanks to a mix of over 300 applications and their Zapier interface, Infusionsoft can connect to hundreds of third-party solutions.
- Built-in shopping cart: Infusionsoft is one of the few marketing automation products that directly inside the tool provide order forms, paid processing, completion and inventory monitoring.
- Scalability: Infusionsoft utilizes universal tracking to monitor the behavior of contact across many marketing channels.
- Trustworthy: Infusionsoft has successfully delivered just what it claims – it enables you to create additional systems to grow your company and concentrate on things that are more essential.
How to set up WooCommerce Infusionsoft connection for your website?
Understanding the reasons why your business needs the help of Infusionsoft may lead you to connect the software with your WooCommerce account. Therefore, we have provided a tutorial on how to set up WooCommerce Infusionsoft integration. It might take you a while for the complete setup phase so make sure that you follow the steps closely to avoid wasting your time!
Step 1: Creating accounts for both platforms
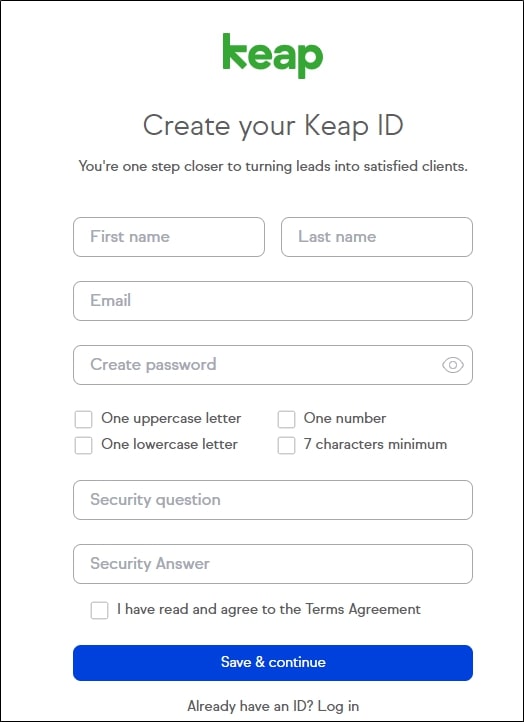
Having an account for Keap and Infusionsoft is one of the requirements for WooCommerce Infusionsoft integration. If you already have your own account for the two software then you can skip this step. On the other hand, follow our instructions to create one by one.
First of all, we will be creating a new account for Keap by entering this link and filling in all of the required information as listed in the image below:
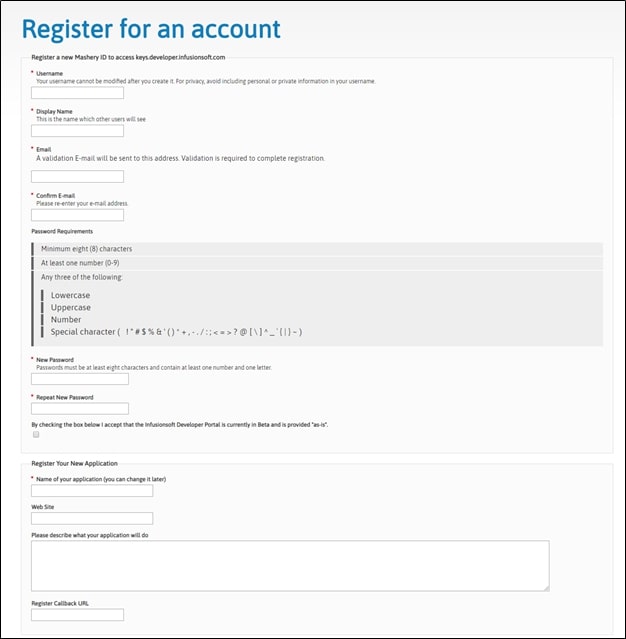
Once you are done with the Keap’s one, let’s move on to the Infusion Developer Account. Navigate to this link and did the same thing as for the Keap account: filling in the empty fields:
Don’t forget to collect your Client ID and Client Secret code after the account has been created:

Step 2: Setting up WC Infusionsoft
Within your account for Infusionsoft, it is necessary to configure the plugin. Quickly install the Infusionsoft for WooCommerce plugin into your online store by going to WooCommerce Dashboard > Plugins > Add New and click on the “Choose File” button to upload your plugin file:

After that, continuously select “Install Now” and “Activate” to make actual use of the plugin!
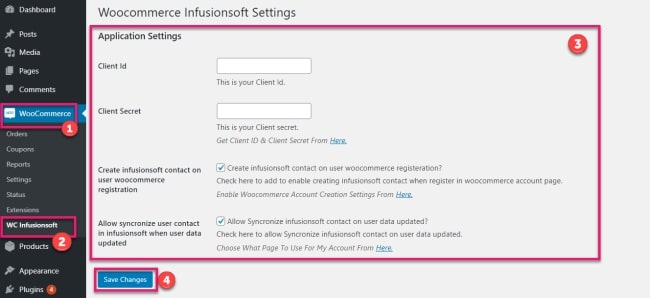
The moment your plugin has been successfully downloaded to your WooCommerce account, go to WooCommerce > WC Infusionsoft section located on your left-hand side then fill in the Client ID and Client Secret that you have taken from step number 1:
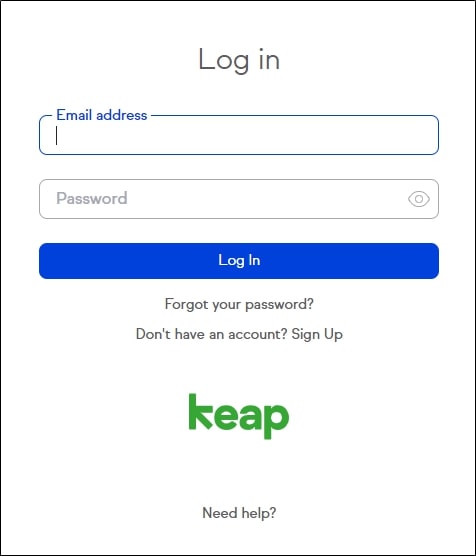
Click on “Save Changes” and WooCommerce will redirect you to a Keap login page, type in your account information:
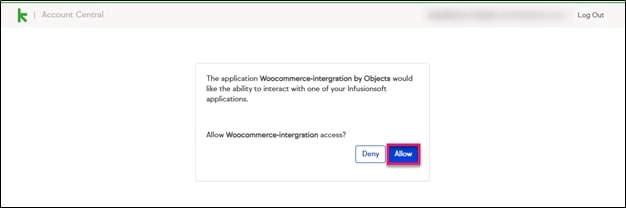
Allowing access for the WC Infusionsoft to your WooCommerce Infusionsoft connection:
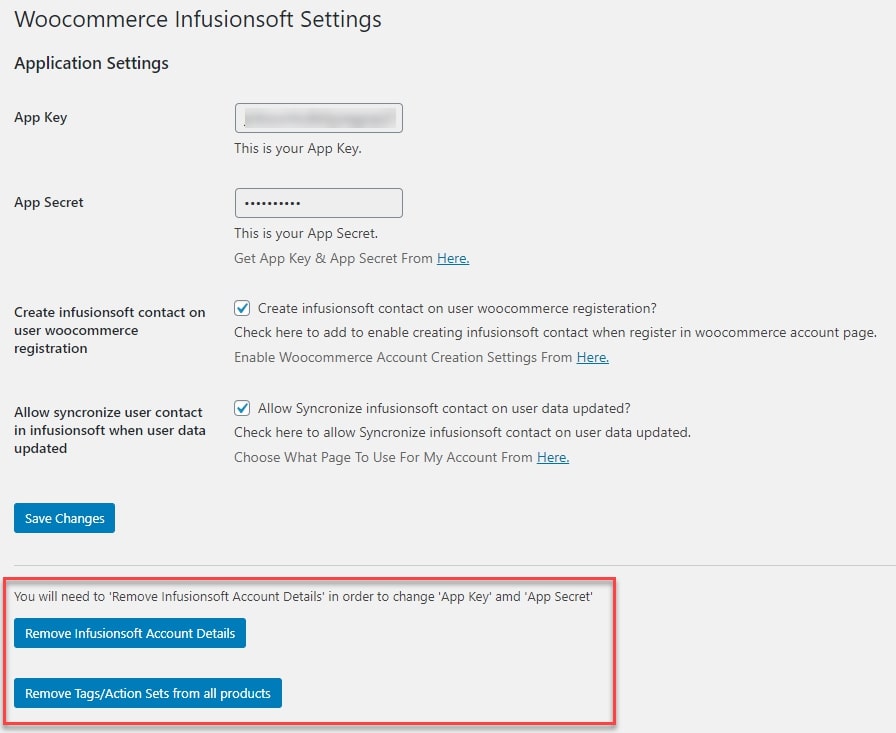
By clicking on the “Remove Infusionsoft Account Details” option you may remove account information (App Key and App Secret). You can also click on “Remove Tags/Action Sets” from all goods button to get rid of the tags and action sets used in your WooCommerce items:
Step 3: Infusionsoft Tags and Actions for Simple and Variable products
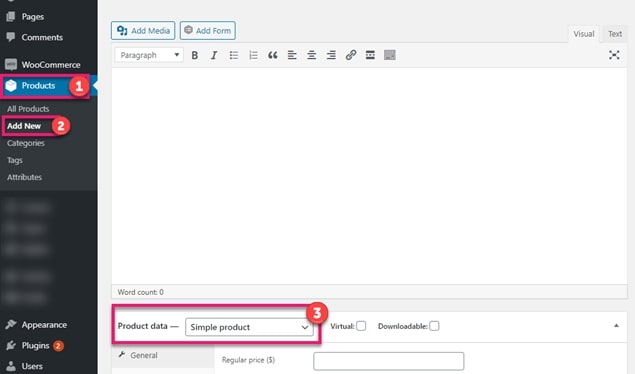
The first thing we need to do for his step is going to Products > Add New and change the dropdown in the “Product data” section into “Simple or Variable products”:
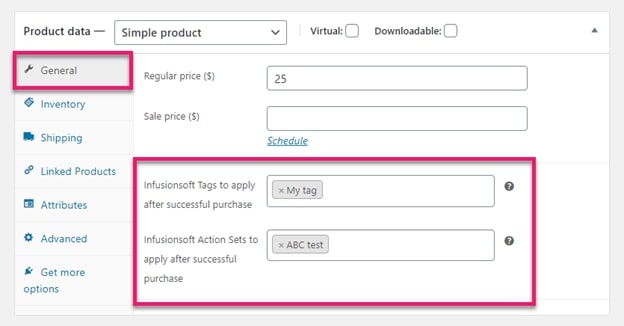
Respectively customize the Infusion Tags and Infusion Action Sets for a simple item field into anything you want:
Do the exact same thing for Variable product when you change the dropdown from “Simple product” to “Variable product”:
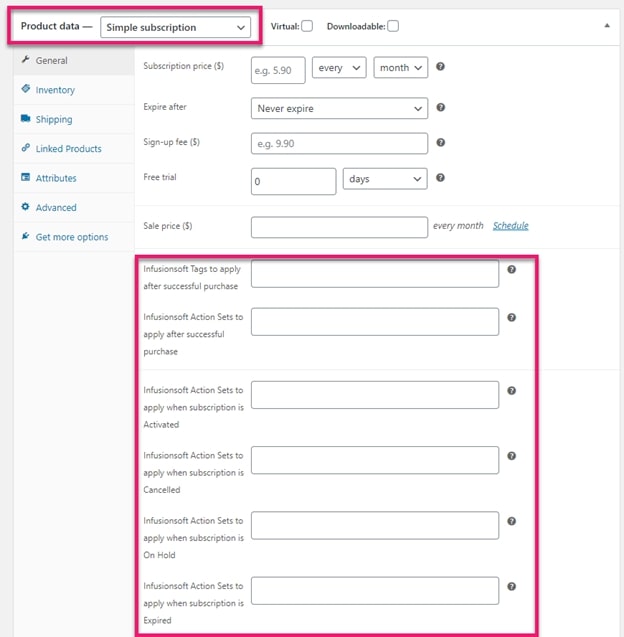
WC Infusionsoft plugin allows online merchants to change the Subscription option for Simple and Variable products, too. The difference is that instead of choosing “Simple product” or “Variable Product” for the dropdown, we will select “Simple Subscription” and “Variable Subscription”.
Plus, you will be picking the Tags and Action Sets for up to 5 different fields, including Subscription, Activated, Subscription Cancelled, Subscription On Hold and Subscription Expired:
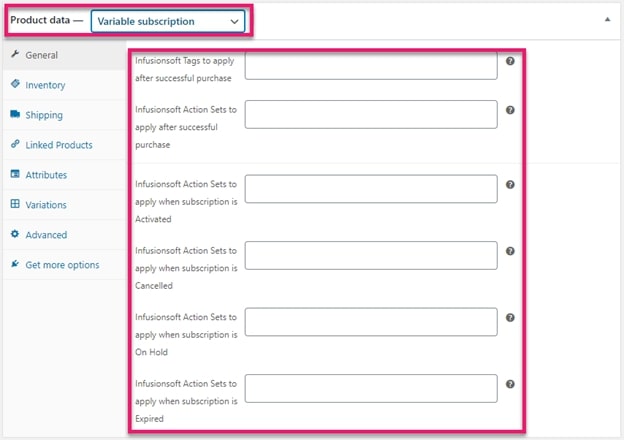
Switch to the “Variable Subscription” tab and perform the same task:
Tags and actions are connected to the profile of the contact. In the Infusionsoft profile, you can examine the tags and activities related to the contact. Under the tab tags, tags may easily be discovered.
Step 4: Activate Checkout features
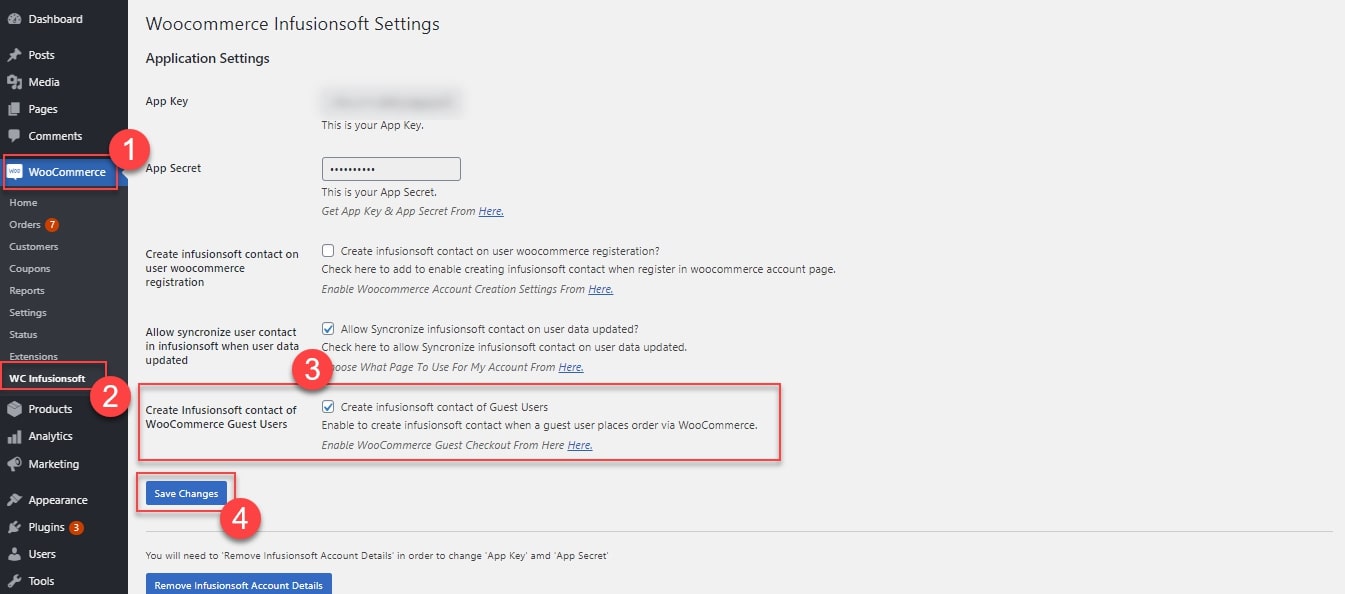
The feature enables guests to check out Woocommerce and synchronize contact and contact information with Infusionsoft CRM. At your WooCommerce > WC Infusionsoft page, tick on the checkbox next to “Create Infusionsoft Contact of Guest Users” alternative and “Save Changes”:
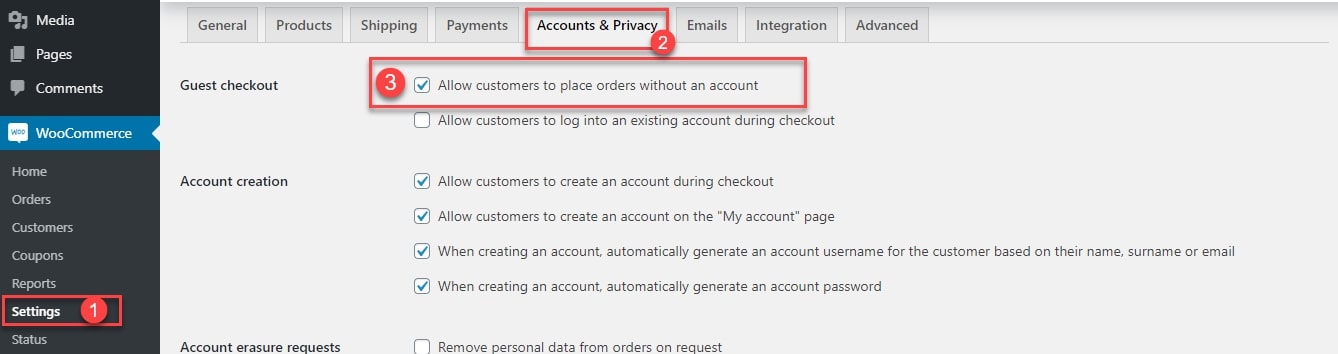
Next, go to the “Settings” page from the WooCommerce control panel and click on “Accounts & Privacy” tab. Here you can enable the option for “Allow customers to place orders without an account”:
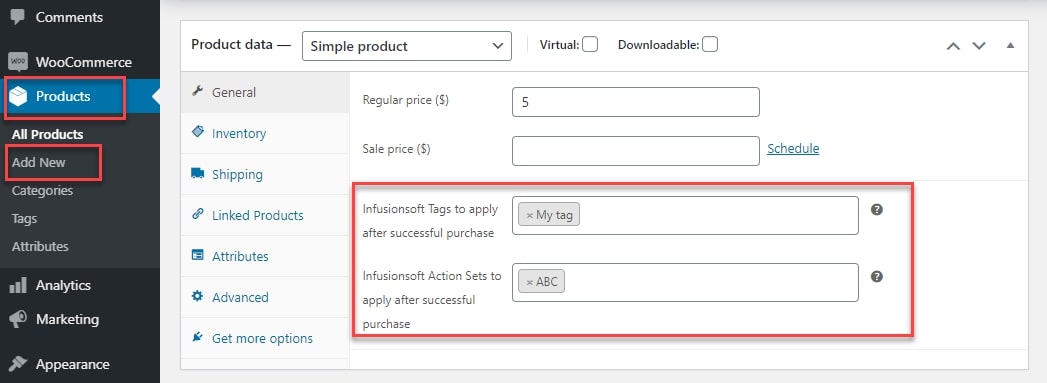
Take a look at WooCommerce Products > Add/Edit a Product, feel free to assign any suitable Tags or Action Sets to a specific product of your choice, then select “Publish” or “Update”. In this way, when one of your anonymous users places an order, the details of the user will be synchronized with your Infusionsoft account, which applies all the product tags and activities:
Step 5: Front-end results
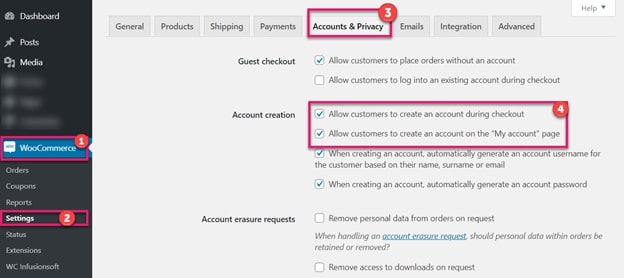
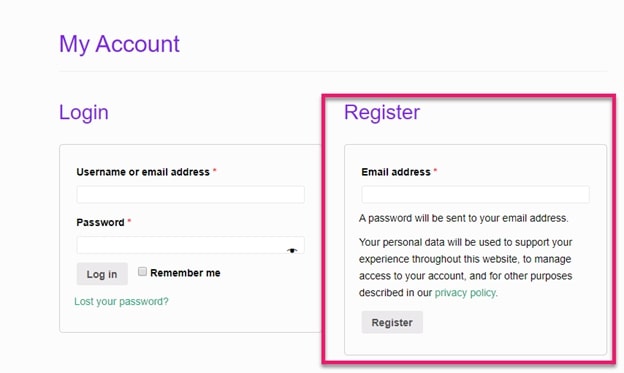
When a user is registered via the Woocommerce My Account Page or checkout, the contact is also added to the contact list of Infusionsoft. Follow the guidelines we have inserted into the picture and “Save Changes”:
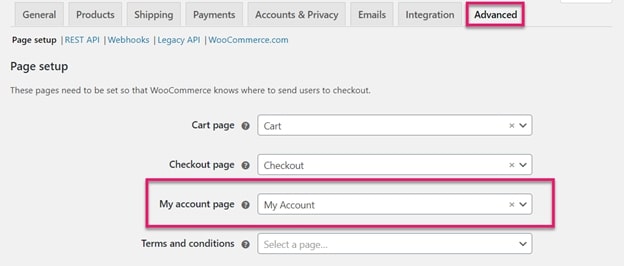
Then move on to the “Advanced” tab and change the page where your “My Account” will be appearing:
After a few clicks, here is how your consumers will view your “WooCommerce My Account” page:
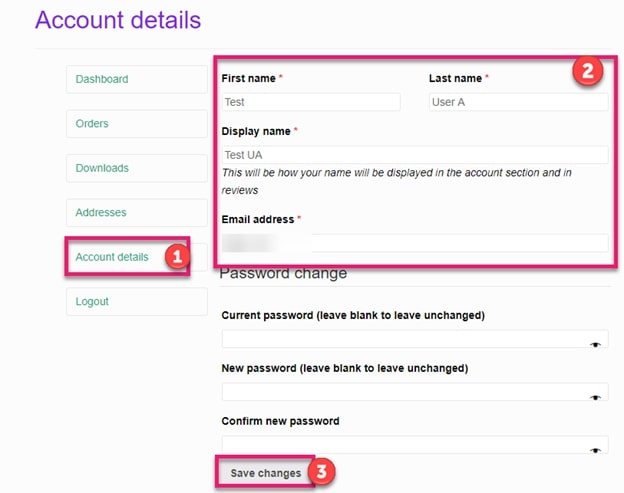
Following that, we also have the “Account Details” page:
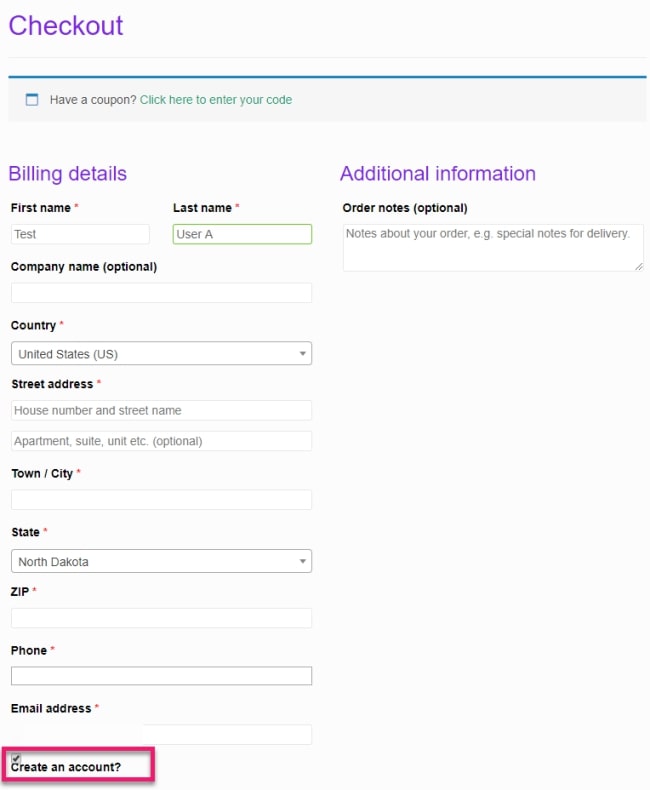
Along with the “Check Out” site:
User accounts are created or updated automatically in the contact list of Infusionsoft. You may look for all the necessary information to locate the contact.